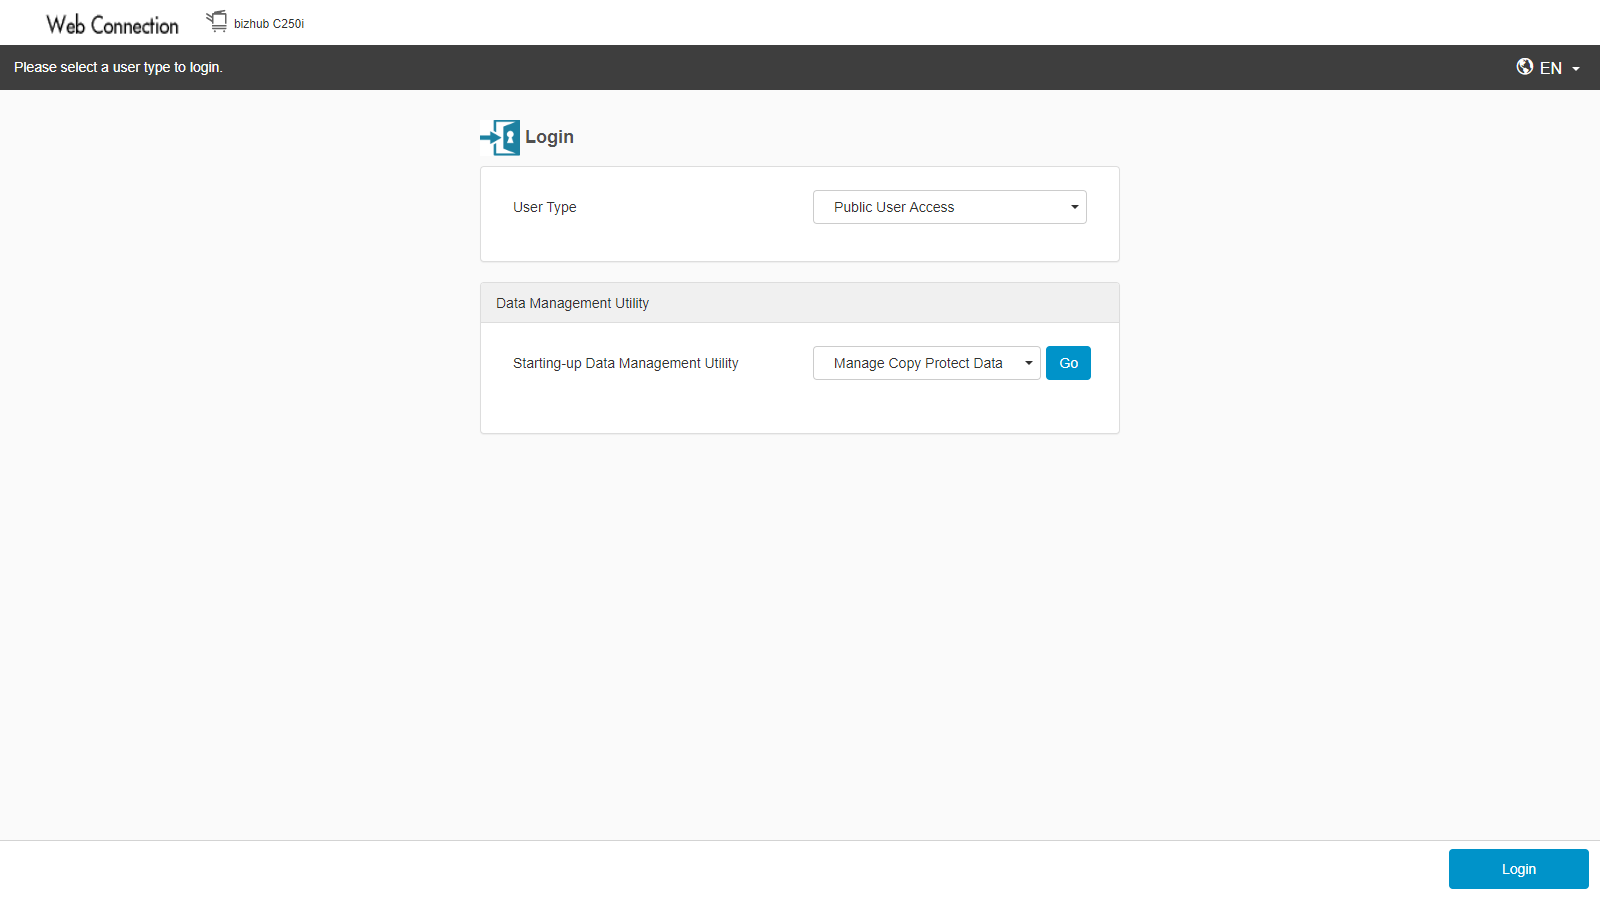
Konica Web conection access is needed for KUARIO Kiosk. You can log in with same administrative password as you use on the device.
Type in the IP-address of your MFP in your browser and continue.
Are you watching this instruction on your phone?
Please make sure your rotate function is active and watch it in the 'landscape' orientation.
When ready, please start the presentation!
Setup your Konica device for
KUARIO Kiosk
You should now be able to use KUARIO Kiosk on your Epson device!
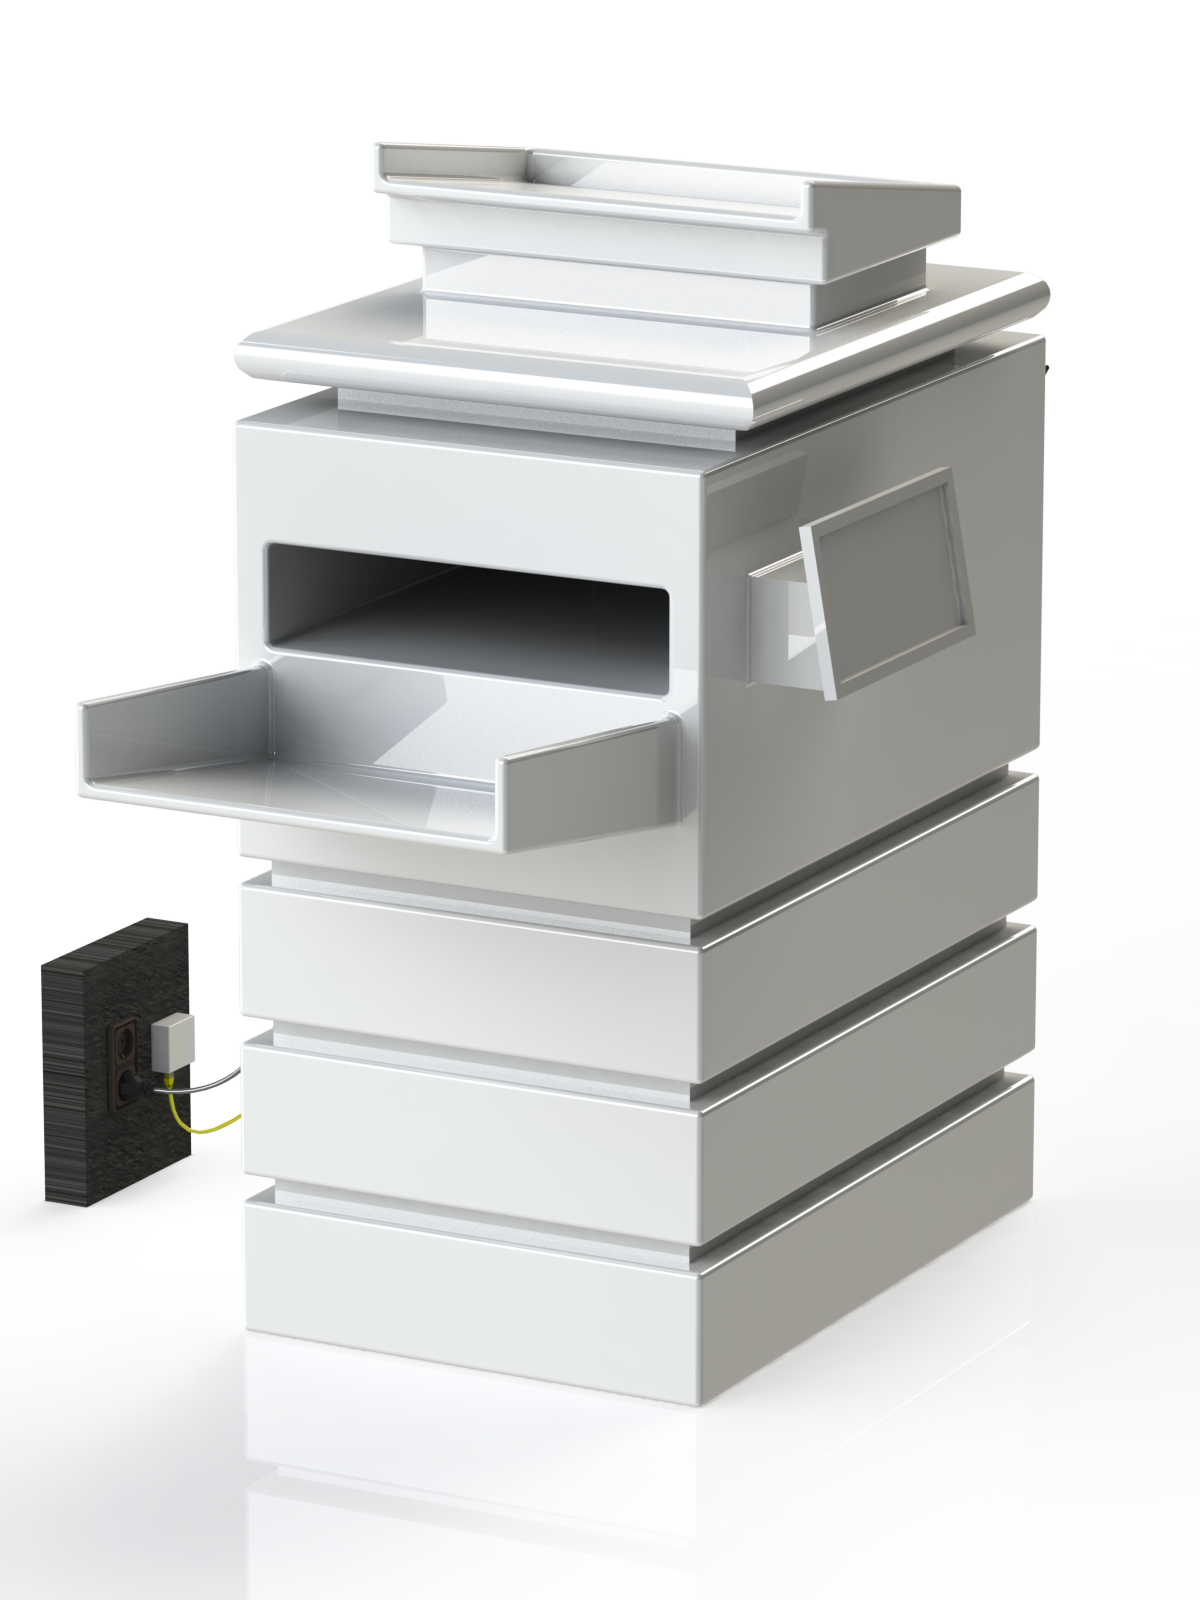
Connect the power to the wall outlet.
Then connect the network to a network outlet connected to the Internet.
Certified Devices
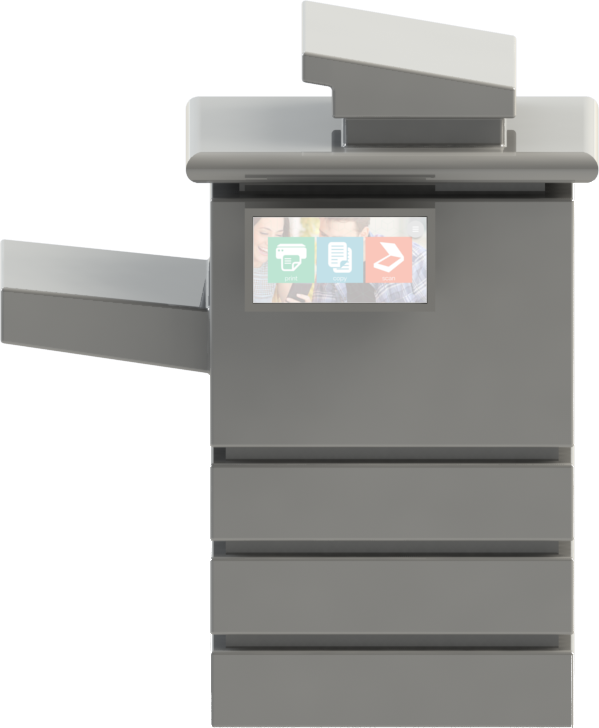
You can install KUARIO Kiosk on KUARIO certified devices. In general these are Bizhub machines running the Chromium webbrowser.
We recommend using Bizhub iSeries as they have a faster response time and therefore a better user experience.
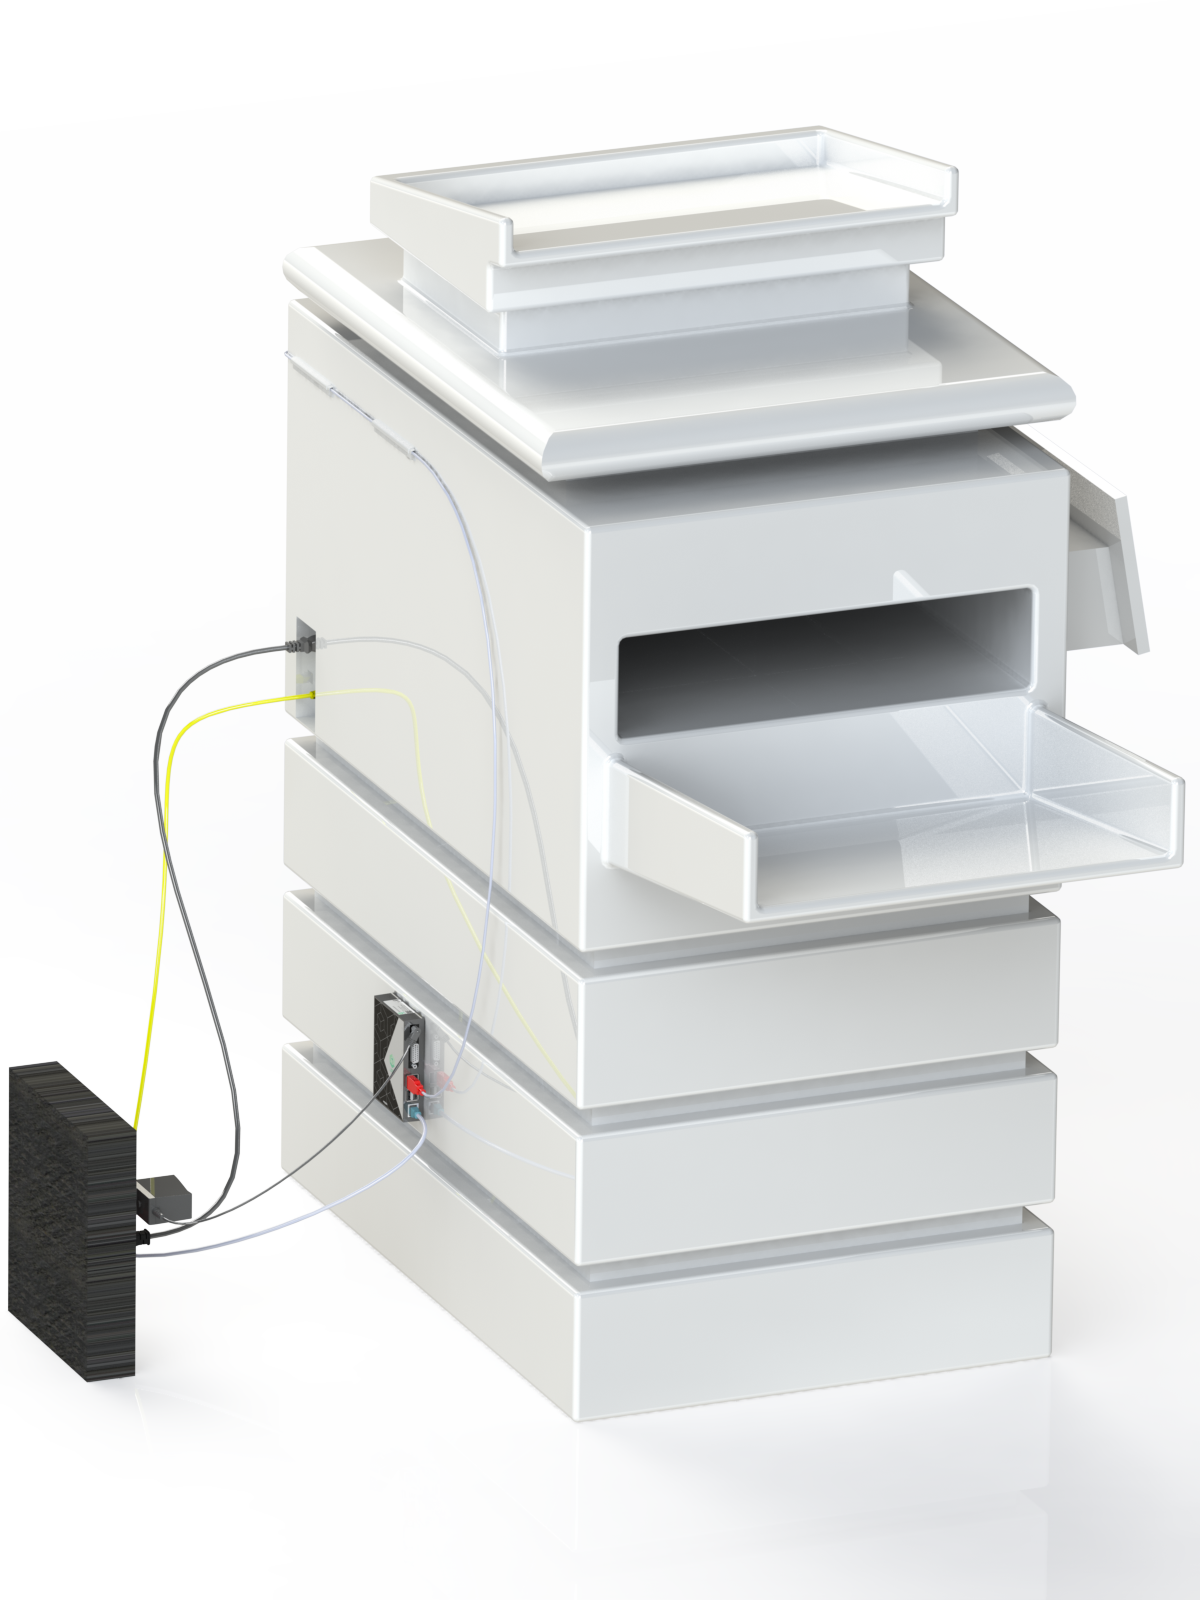
Attach the KUARIO Smart connector to the back of the MFP.
Connect the USB cable coming from the SCR bracket.
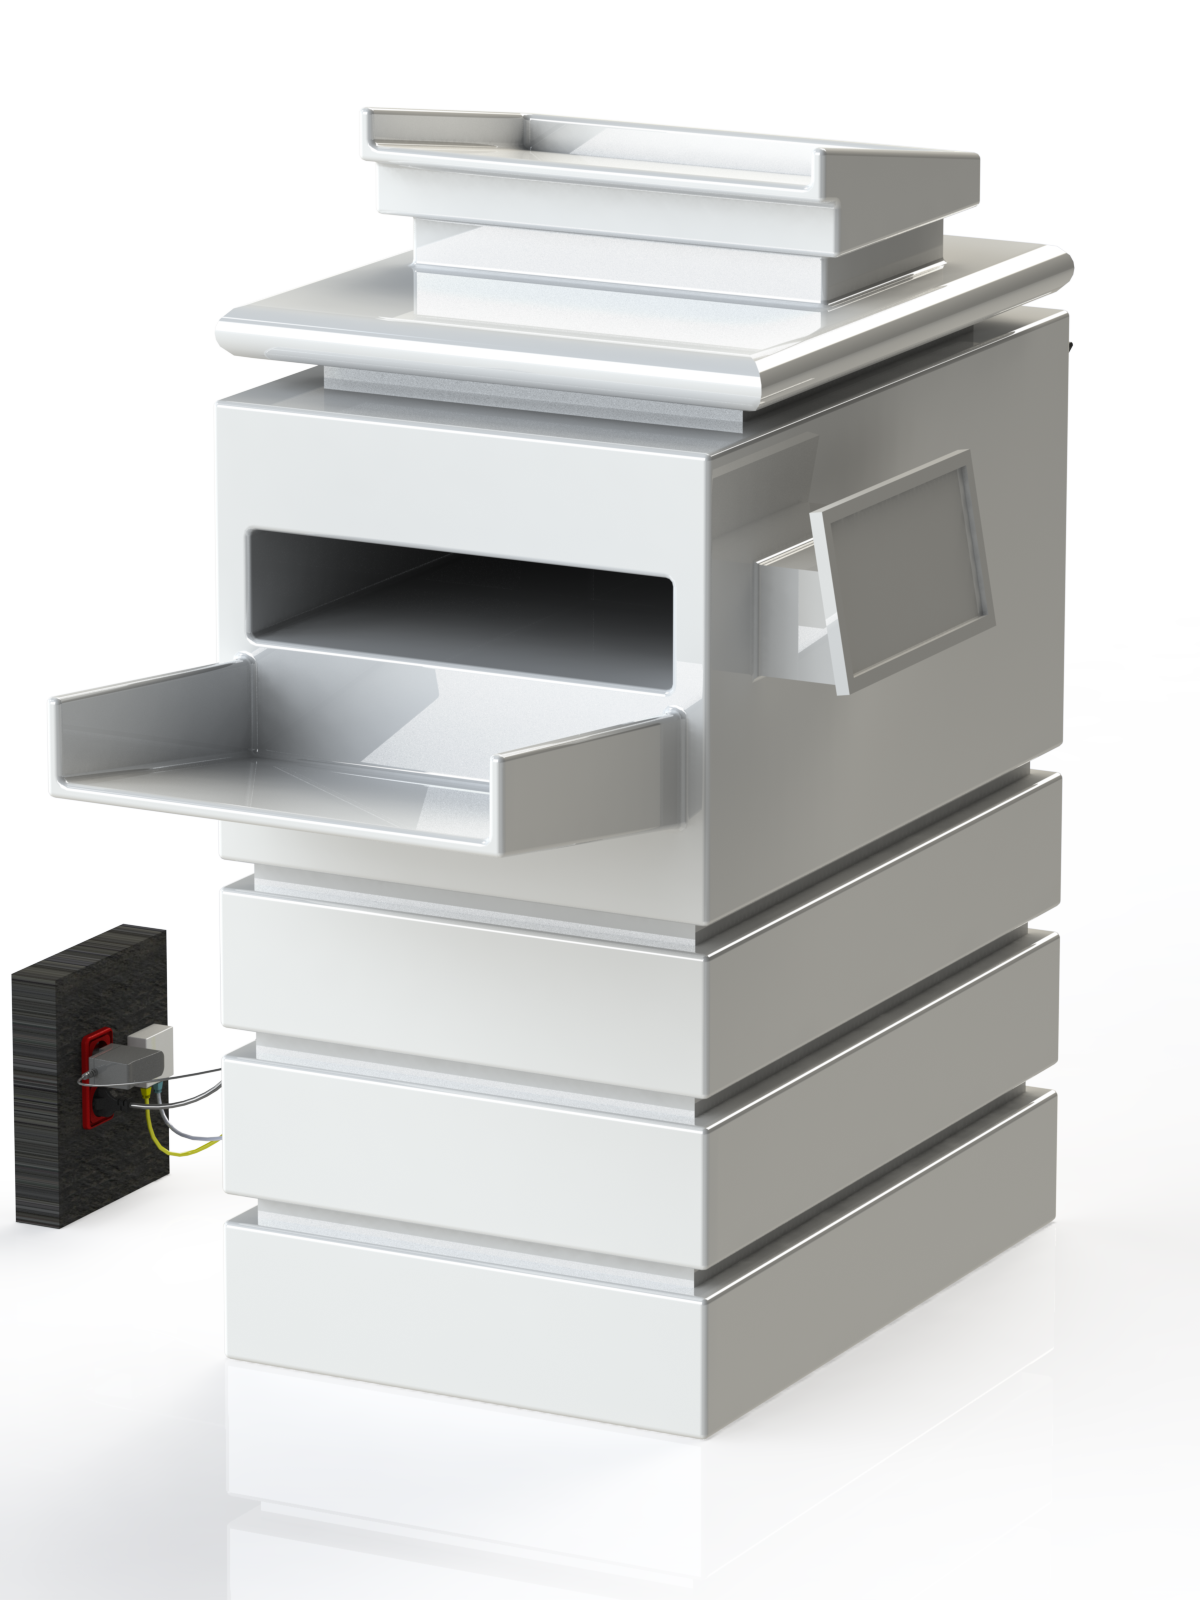
Now also connect the power of the KUARIO Smart Connector to the wall outlet.
Finally also connect the network to a network outlet connected to the Internet.
Note! The KUARIO Smart Connector and the MFP must each be connected to the Internet. They must NOT be connected to each other!
-clip001600900.png)
Bizhub Classic or Bizhub iSeries? Please select your device!
Bizhub Classic
with Chromium browser
Bizhub iSeries
Select you tutorial path by selecting Bizhub Classic or Bizhub iSeries.
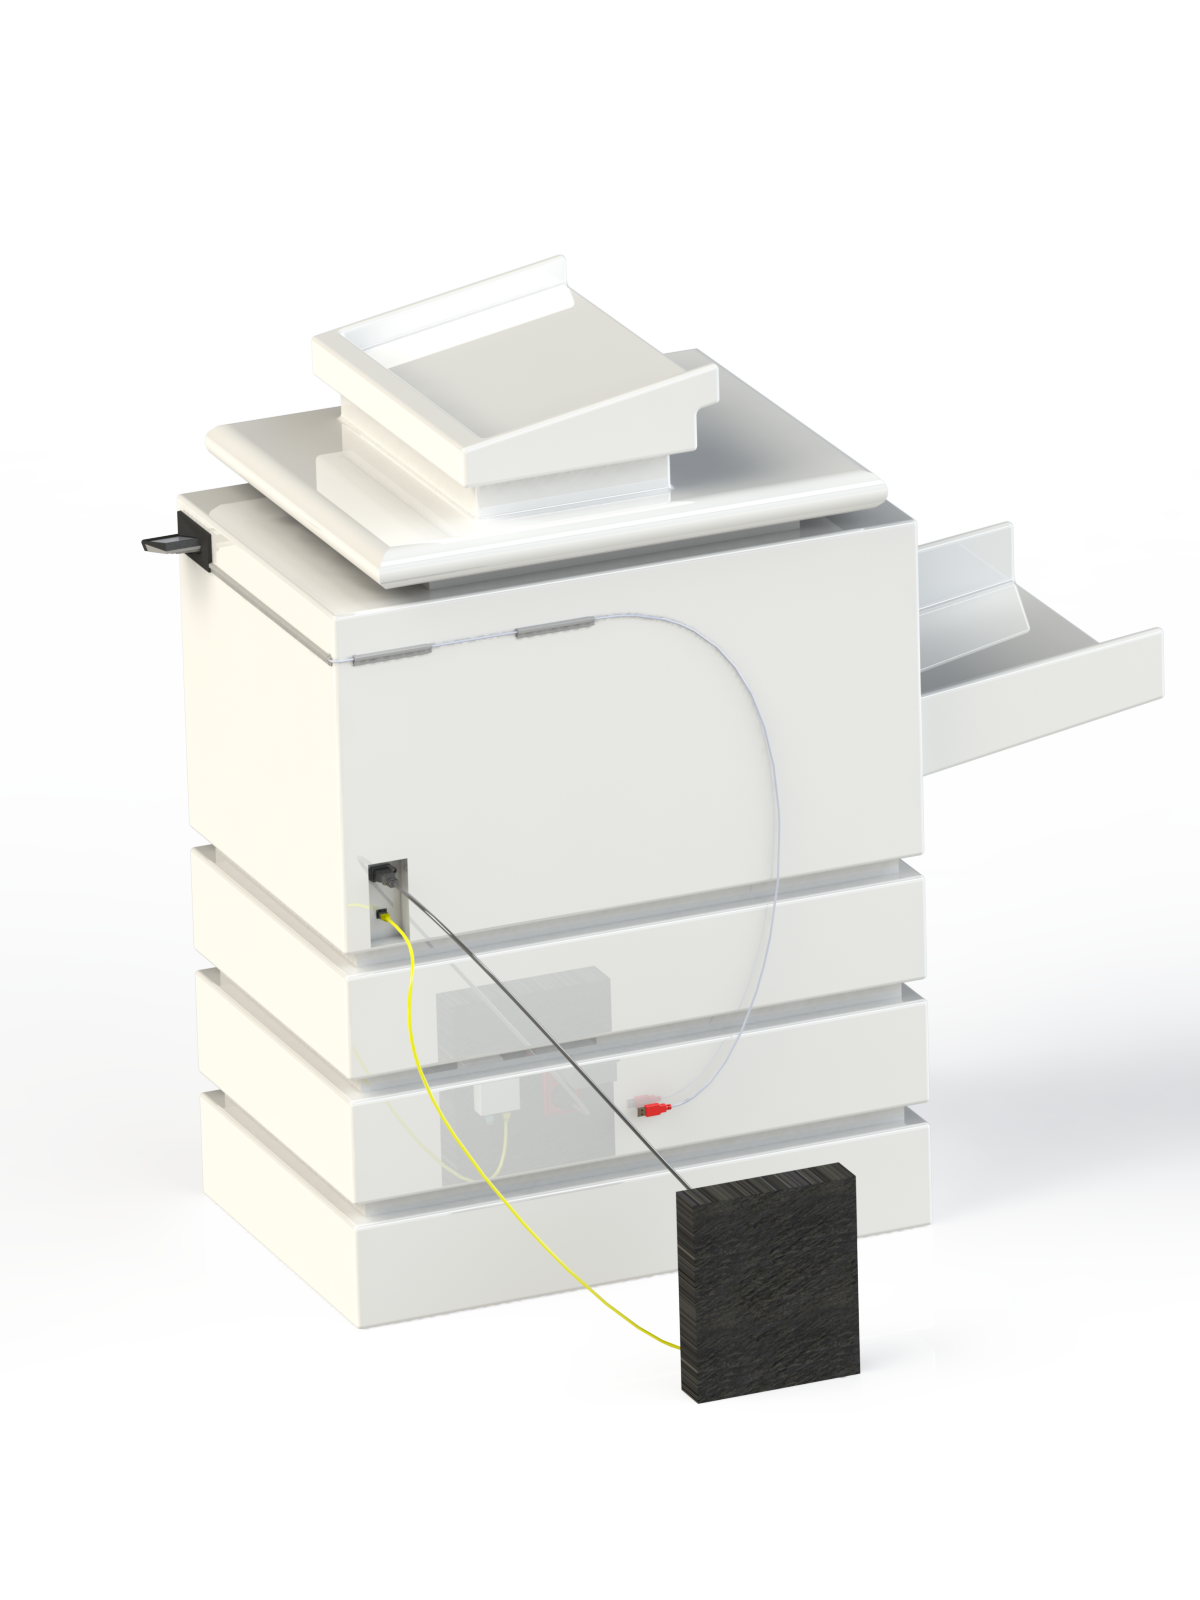
Attach the SCR Bracket to the copier.
Use the cable guides to guide the USB cable to the back.
To reboot the MFP, click the On/Off button on the panel.

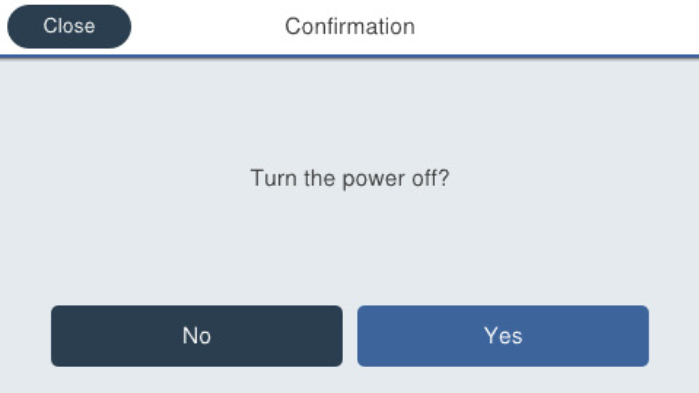
Note! The MFP must be rebooted to finish the setup process. Please reboot the MFP using the On/Off button on the panel.
Confirm to shut down by clicking yes. When MFP is completly shut down, power the MFP up, using the On/Off button on the panel.

Requirements
It is recommended to solely run the KUARIO Web Kiosk application on the MFP. This means that if any other application have
been installed on the MFP, it is best to uninstall them all before installing the KUARIO Web Kiosk.

Log in with your Konica Administrative account.

Go to System settings.
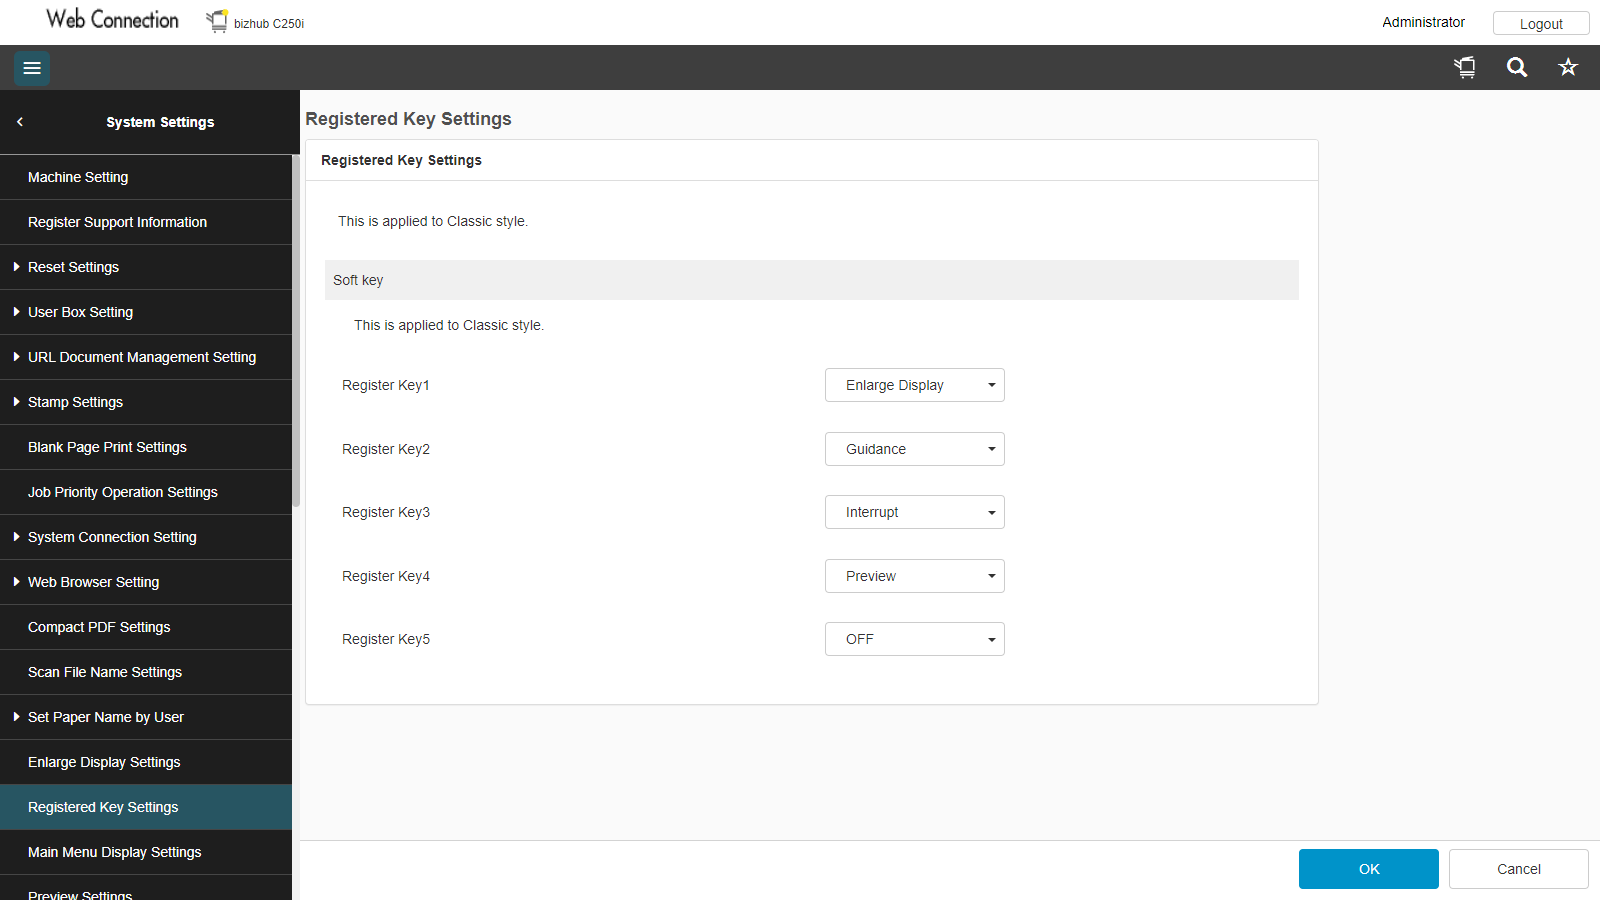
Remove all functions that may not be used outside of KUARIO Web Kiosk.
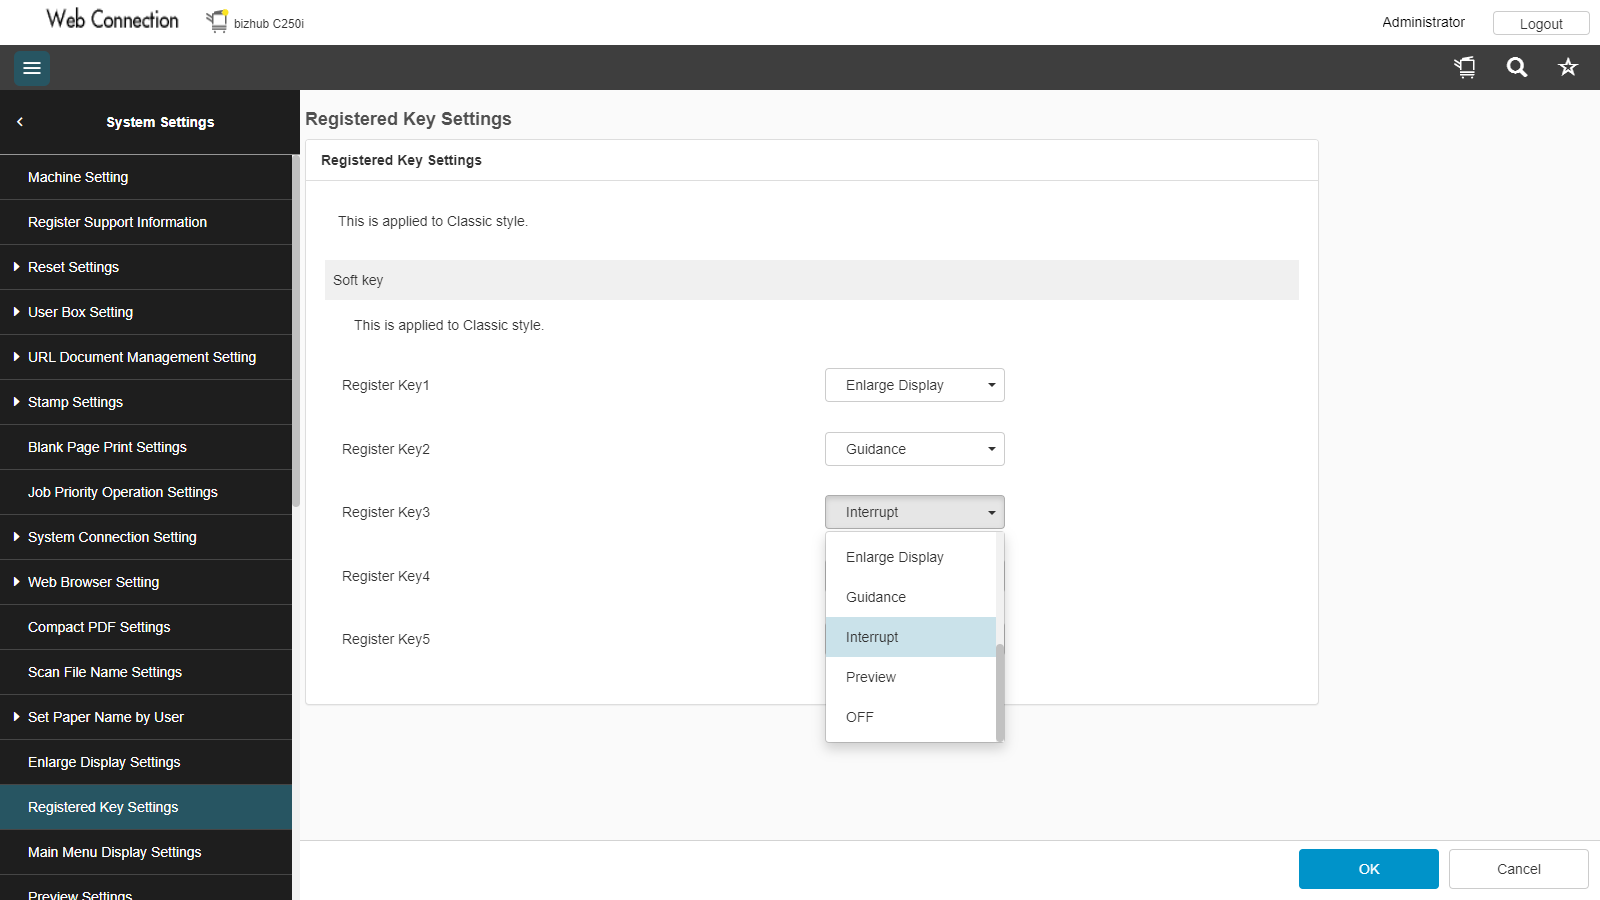
To Remove a key function, set it to OFF.
Confirm with OK.
Go to Network.

Go to TCP/IP Setting.
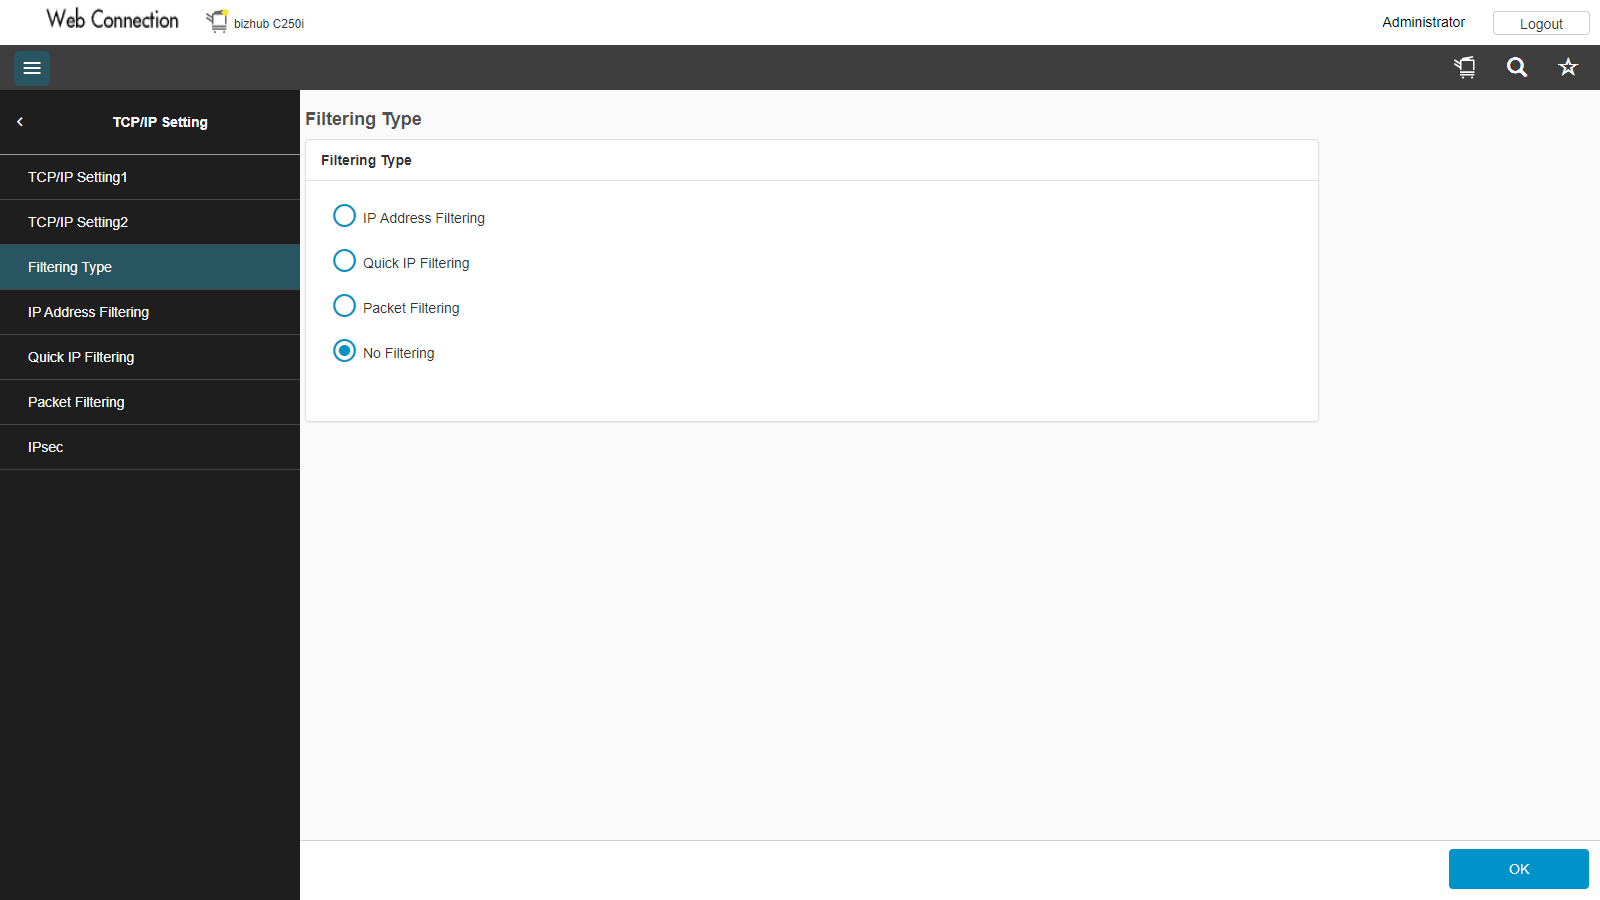
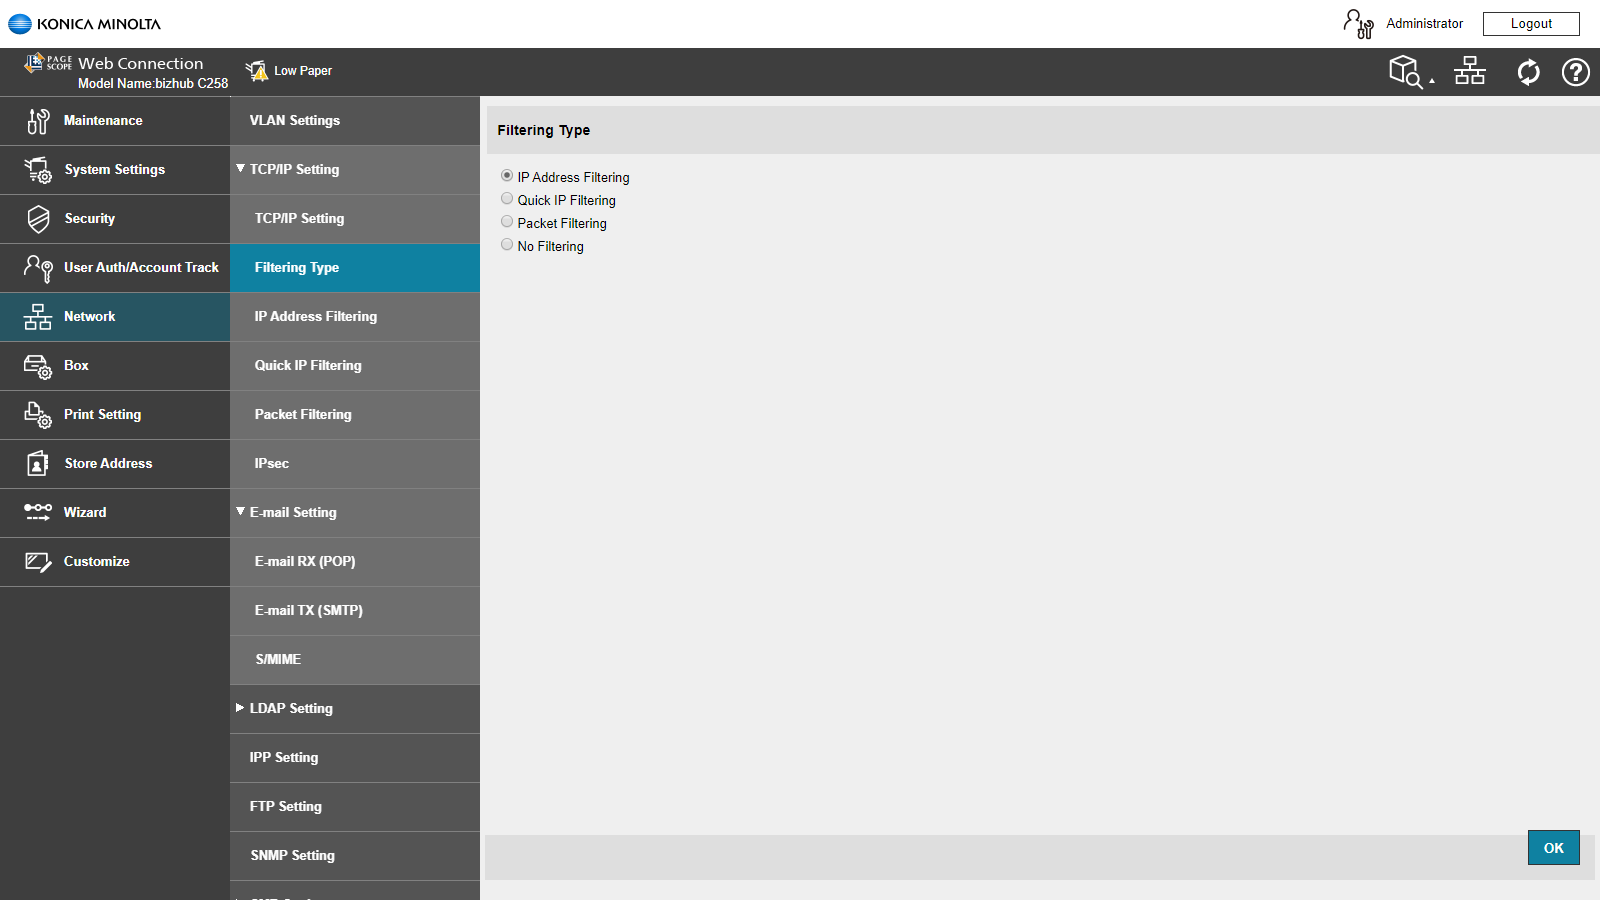
Go to Filtering Type.

Set filtering type to IP Address Filtering and confirm with OK.
Go to Network -> Web Browser Settings.

Set both addresses in one range to the address of the KUARIO Smart Connector.
Make sure to set one IP or IP-range so that it includes your workstation to keep your access to the MFP.
Note:
If you do not, you will lock yourself out of this MFP!
Click OK to confirm.

Select Administrator
Note! The next steps MUST be executed on the MFP, these settings can not be found or edited remotely!
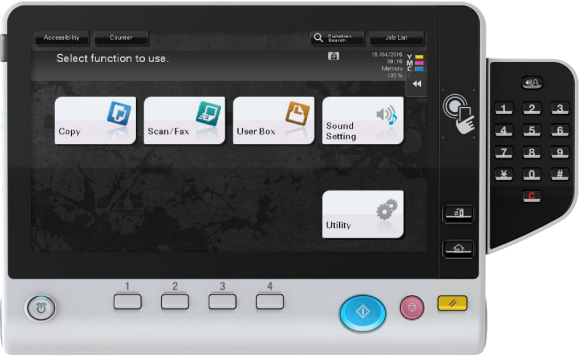
Go to the MFP and log in as Administrator.
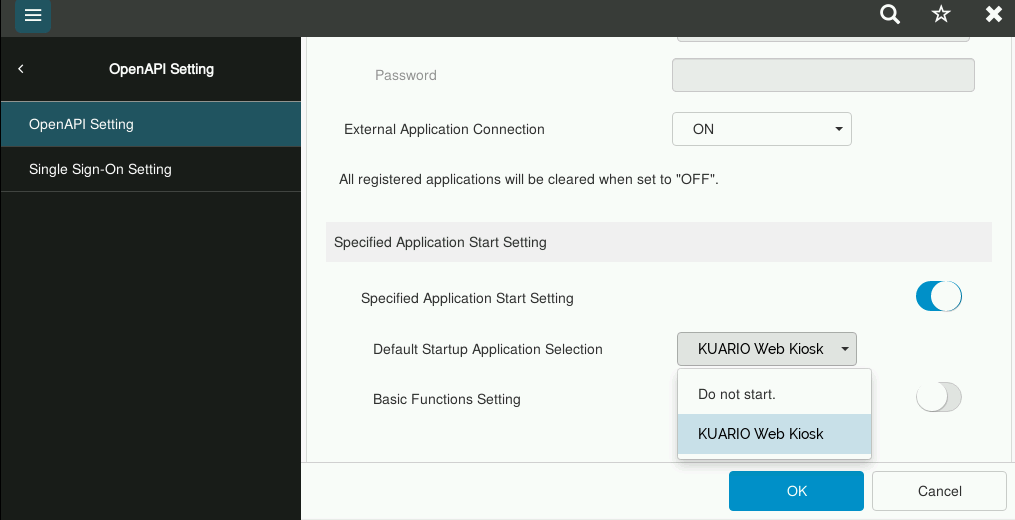
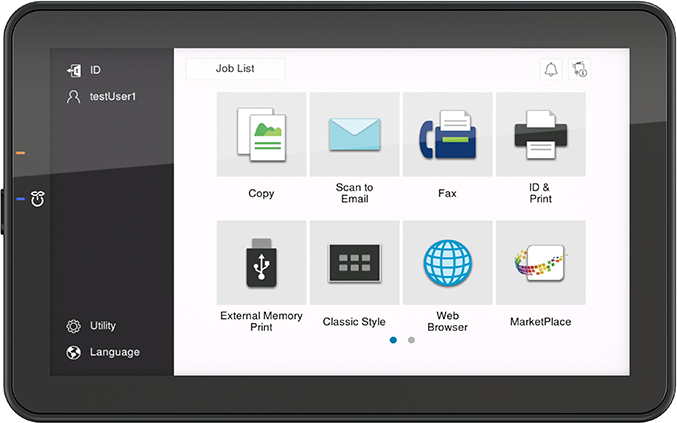
Enable Specified Application Start Setting.
Select KUARIO Web Kiosk as
Default Start Application.
Disable Basic Function Seting.
Go on the MFP to the Utility menu, using Adminstrator credentials,
Navigate to Network -> OpenAPI Settings.
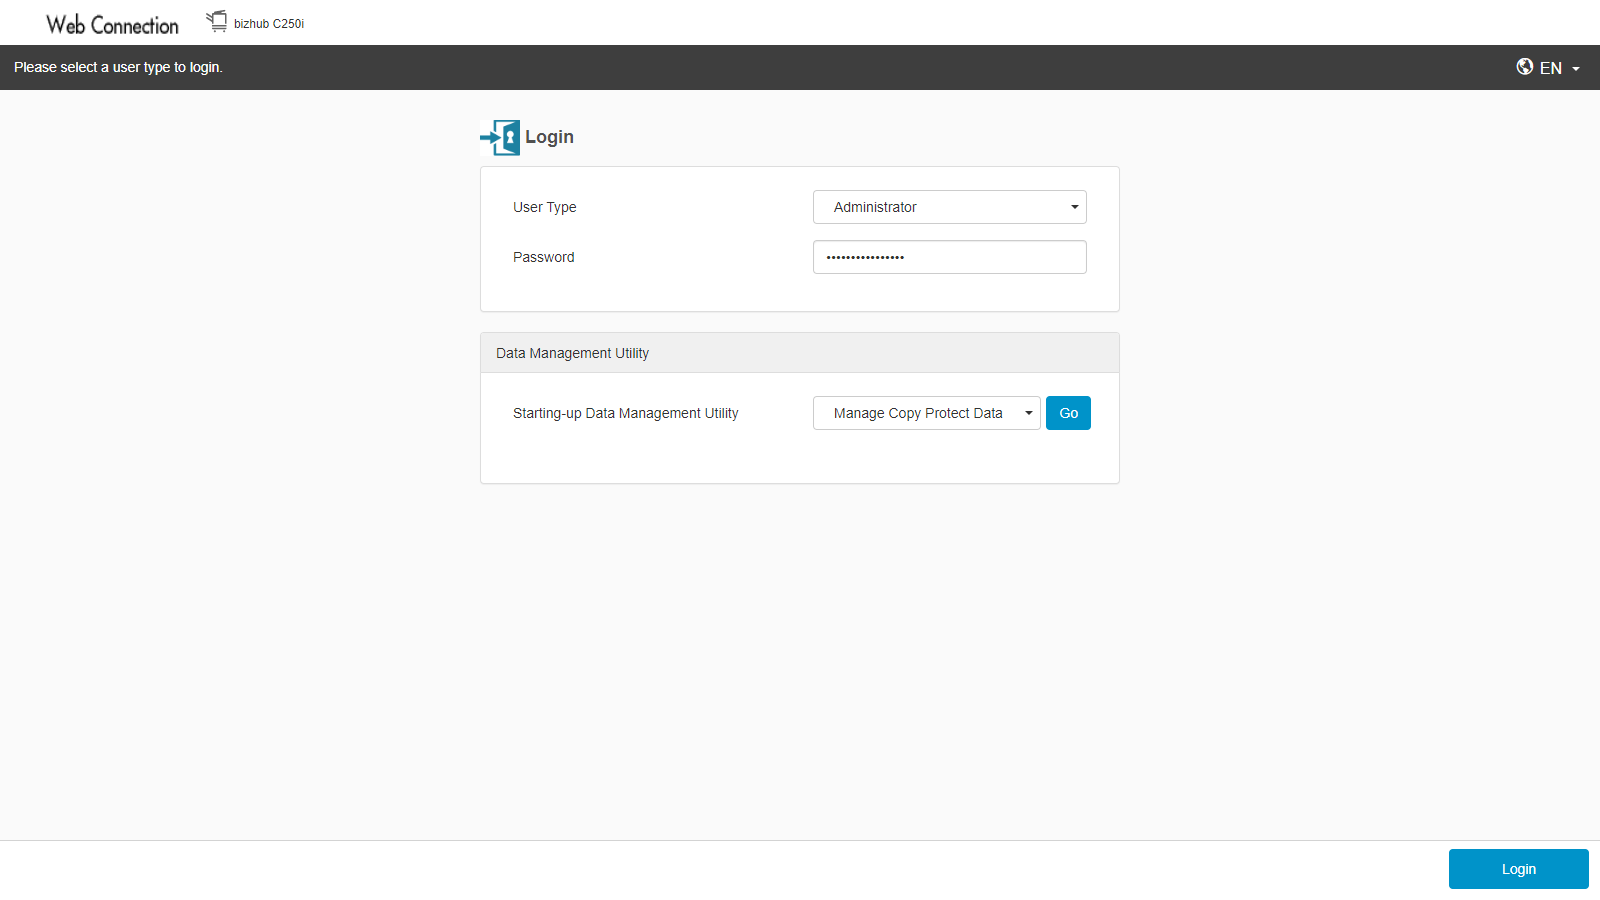
Konica Web conection access is needed for KUARIO Kiosk. You can log in with same administrative password as you use on the device.
Type in the IP-address of your MFP in your browser and continue.
Activation Konica Kiosk
Dear KUARIO Support,
Could you help me with the activation of my Konica device?
1. Organization name: My Organization
2. Currency Used: Euro
3. Country of this Outlet: The Netherlands
4. Name of this Outlet: <The name by which I recognise this Konica device>
5. MAC-address of KUARIO Smart Connector: 00:AA:BB:CC:DD:EE <--Do not use this example but the address of your Smart Connector!
6. The IP-address of your Konica Device: 10.4.1.106 <--Do not use this example but the address of your Konica Device
7. The Konica device's Administrator credentials: admin | my$ecretPa$$VVord <--Do not use this example but the login credentials of your Konica device
Kind regards,
me
You now have concluded the installation.
Please test if you are unable to do actions outside the system or if you are able to print, copy or scan without paying.
If you are able do do any of those actions, please retrace your steps and make sure you followed all the steps.
Depeding on your configuration you should be required to pay for each product.
Otherwise contact KUARIO Support.
You now have almost concluded the installation.
Now you need to wait for KUARIO Support to setup the KUARIO Smart Connector. This may take up to two work days.
When you get the confimation that the KUARIO Smart Connector is ready for use, continue with the final step.
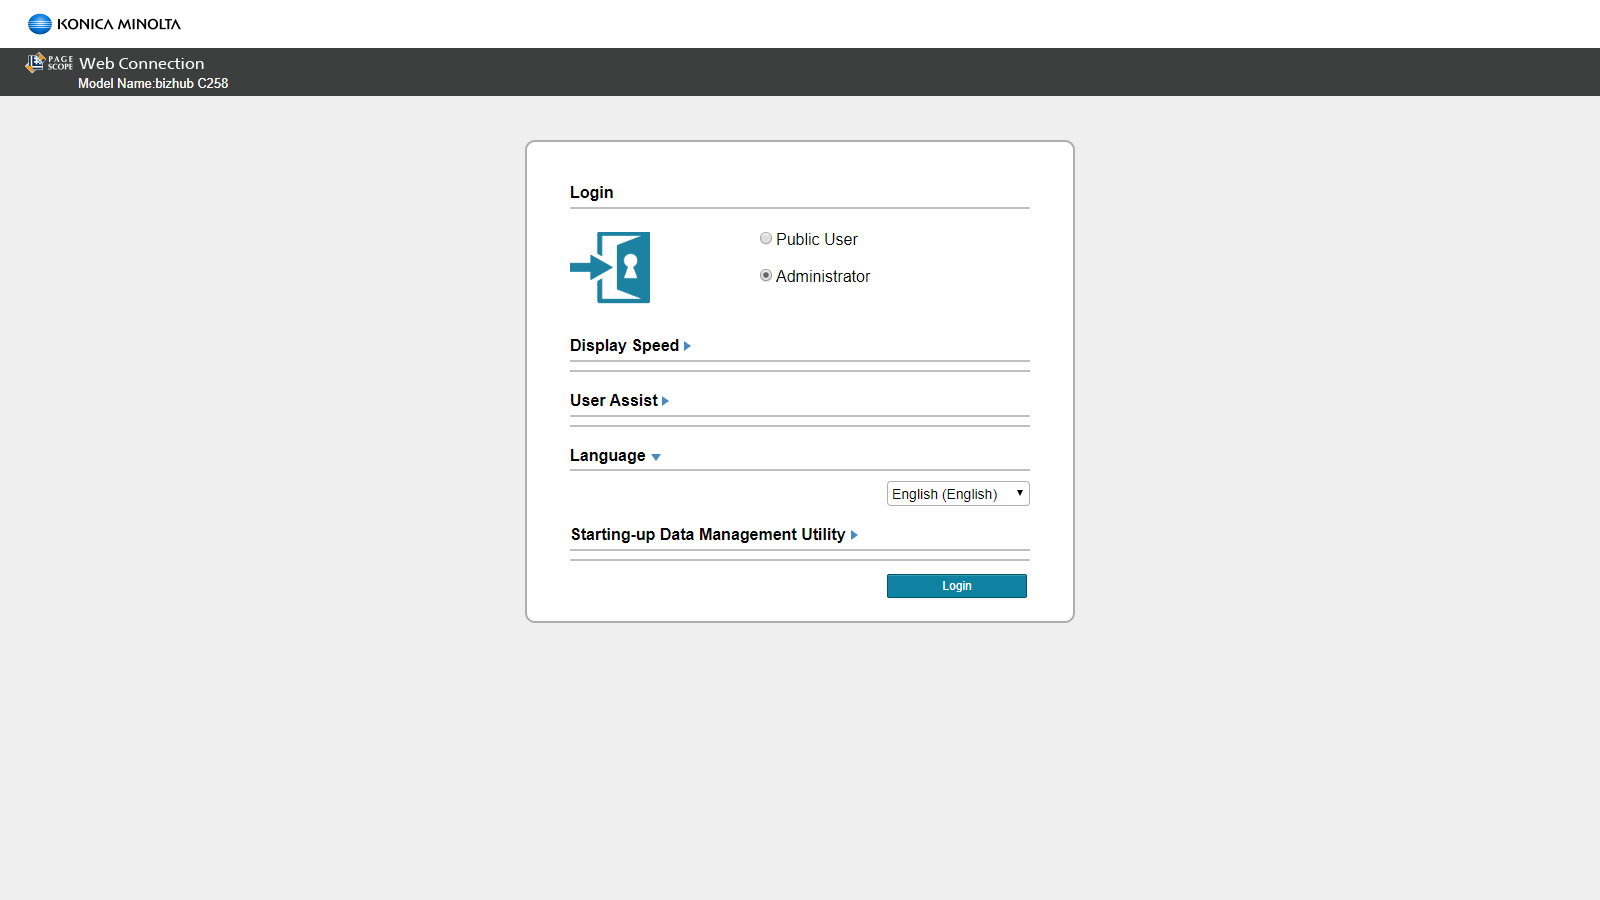

Select Administrator and login.
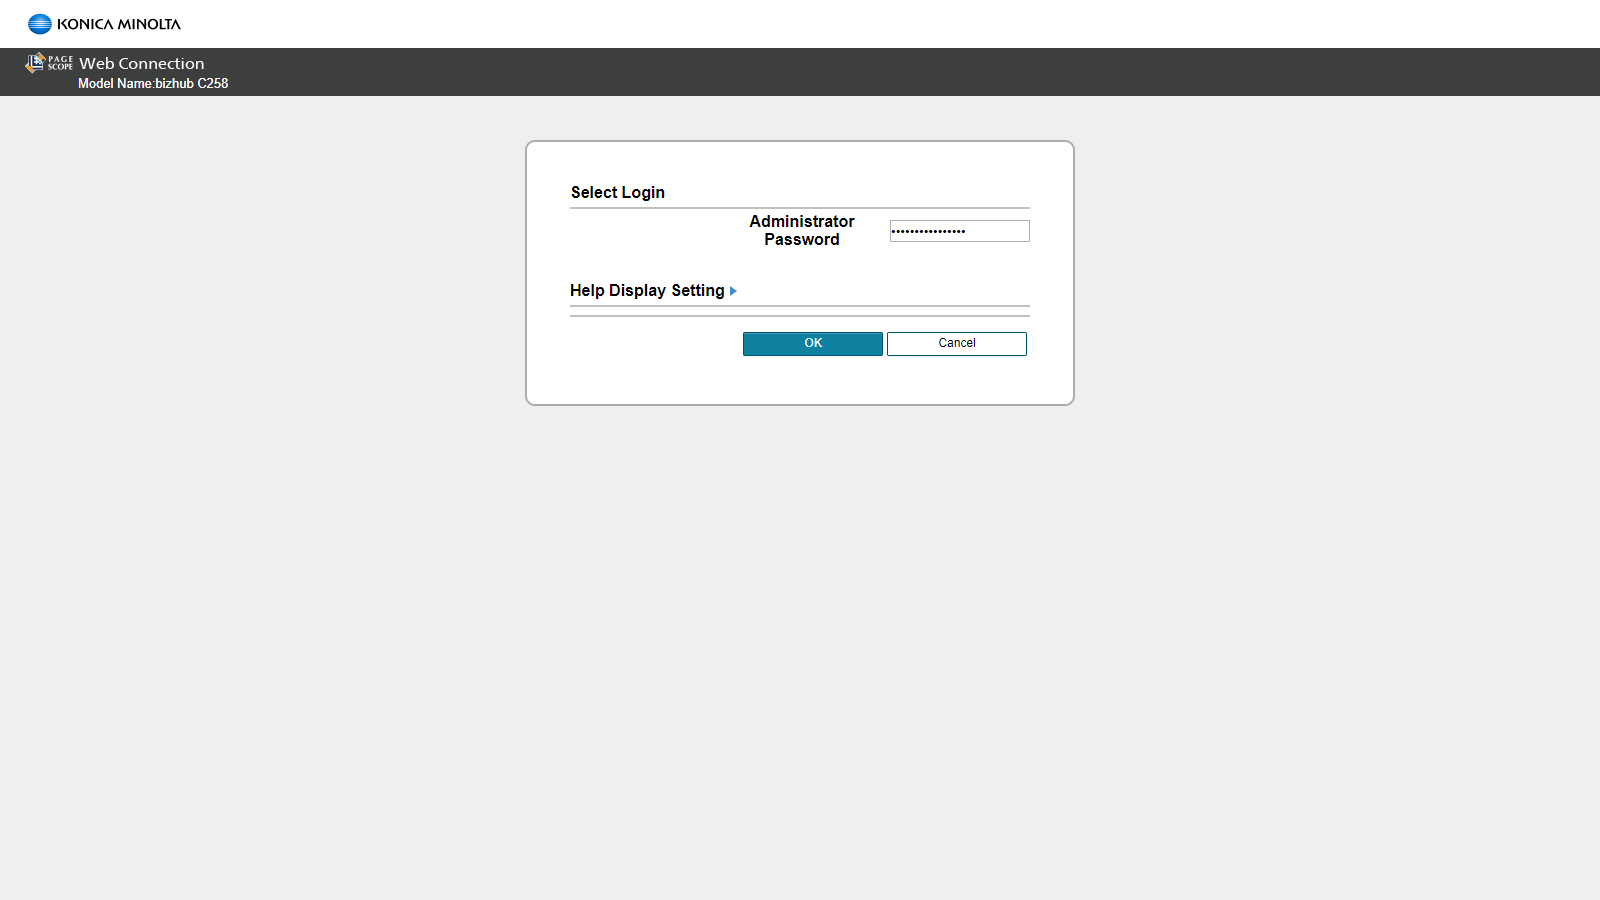
Enter the password and click OK.
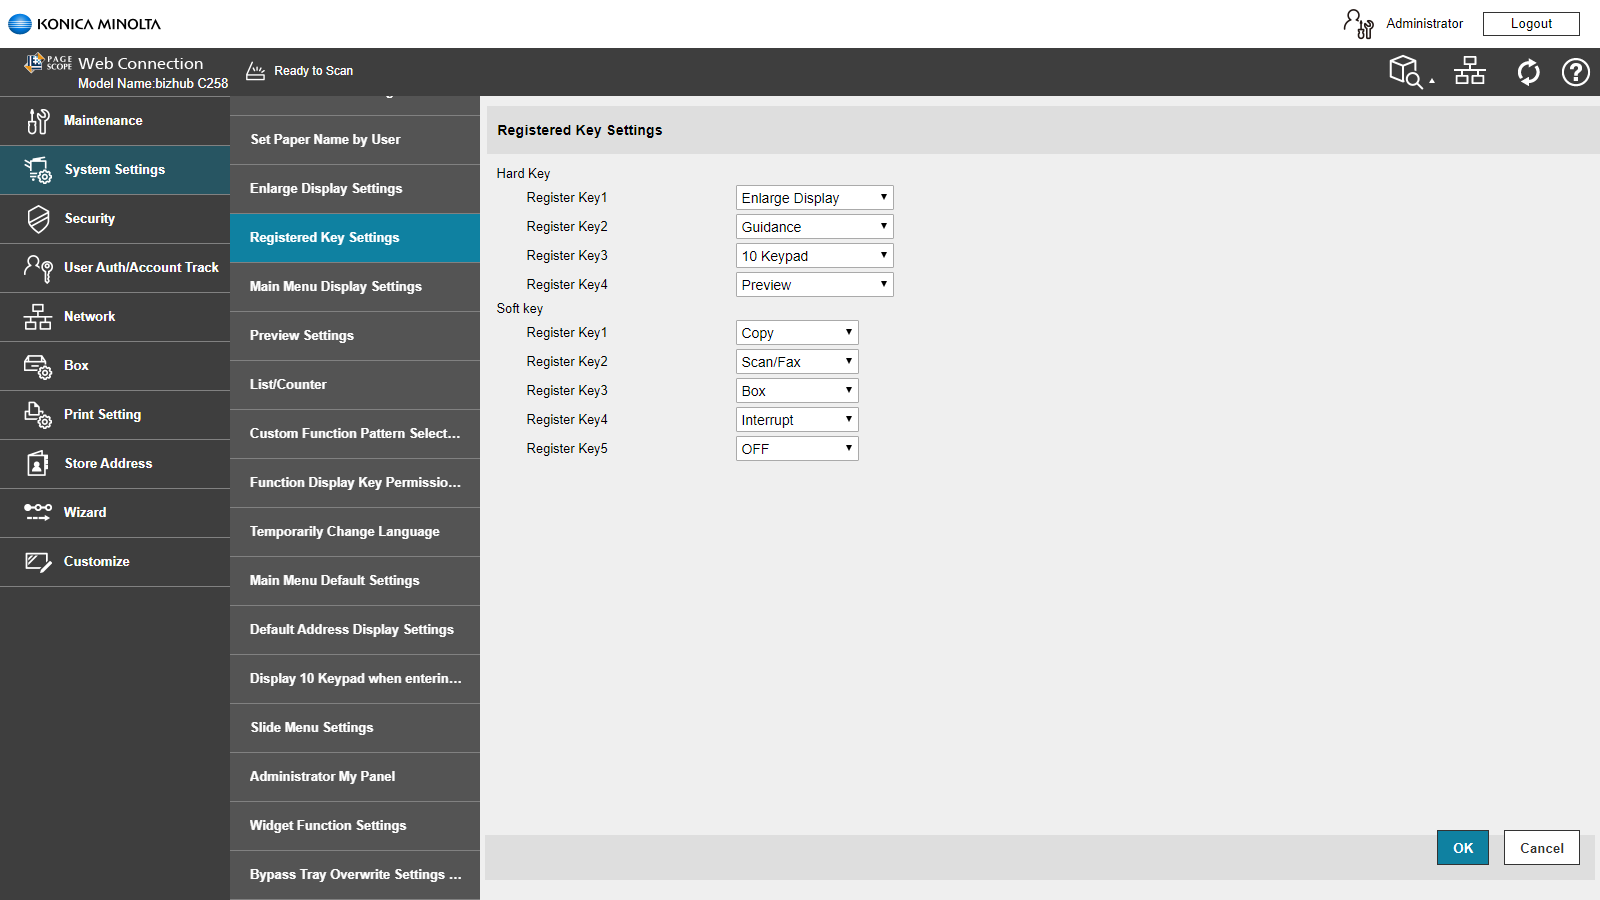
Remove all functions that may not be used outside of KUARIO Web Kiosk.
Go to System Settings -> Registered Key Settings.

Select IP Address Filtering.
Go to Network -> Filtering Type.
Select IP Address Filtering.
Go to Network -> Filtering Type.
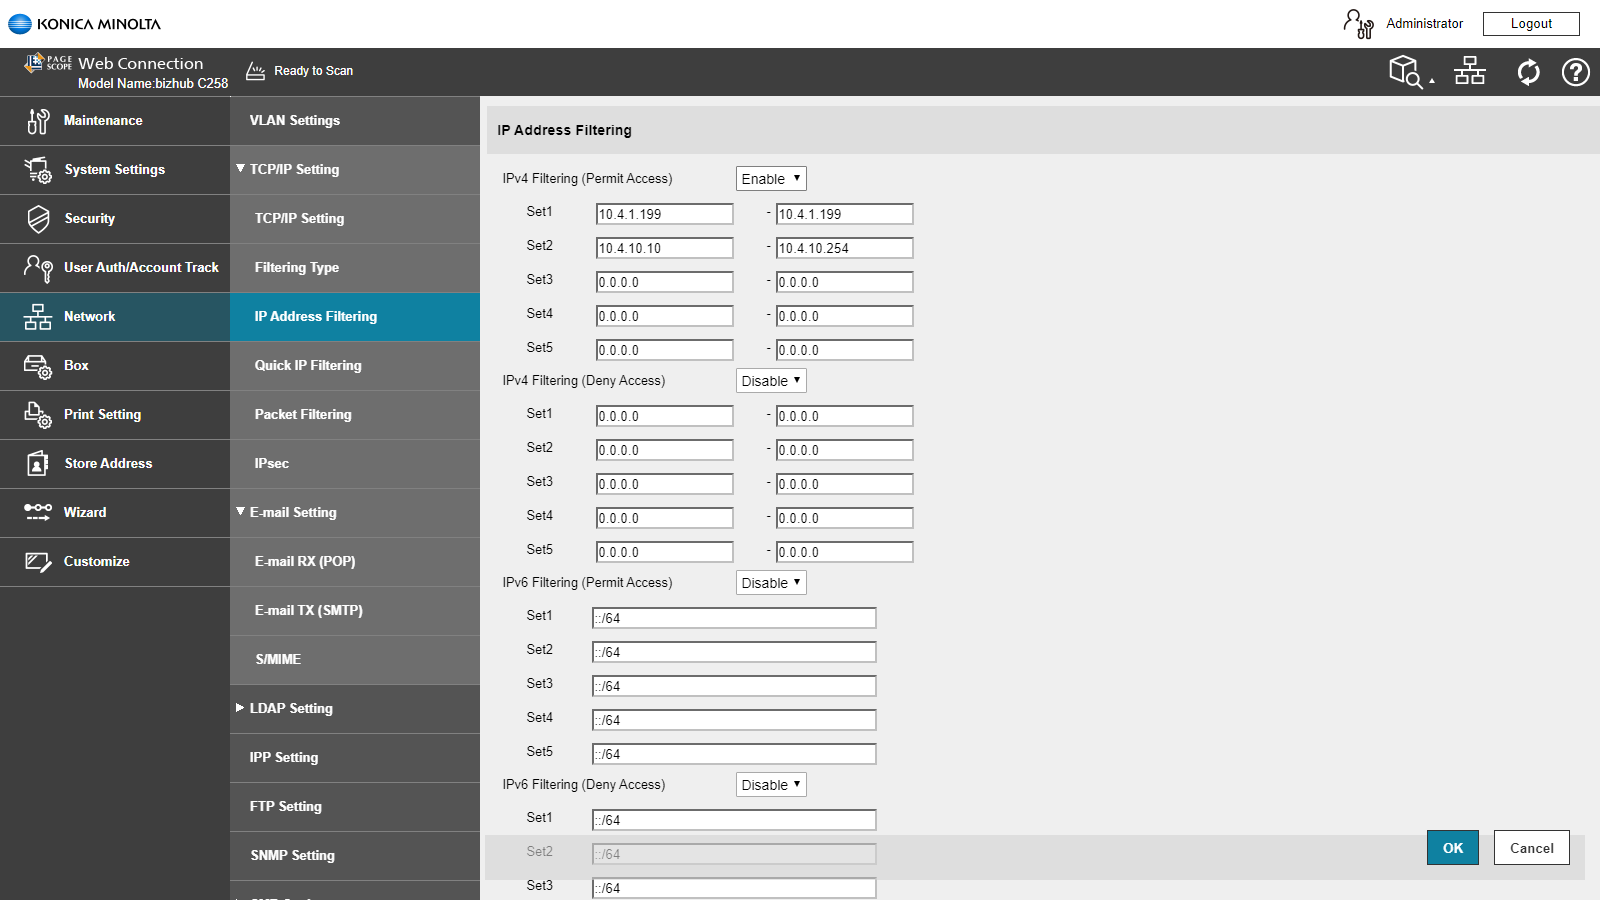
Go to Network -> IP Addresses Filtering.
Set both addresses in one range to the address of the KUARIO Smart Connector.
Make sure to set one IP or IP-range so that it includes your workstation to keep your access to the MFP.
Note:
If you do not, you will lock yourself out of this MFP!
Click OK to confirm.
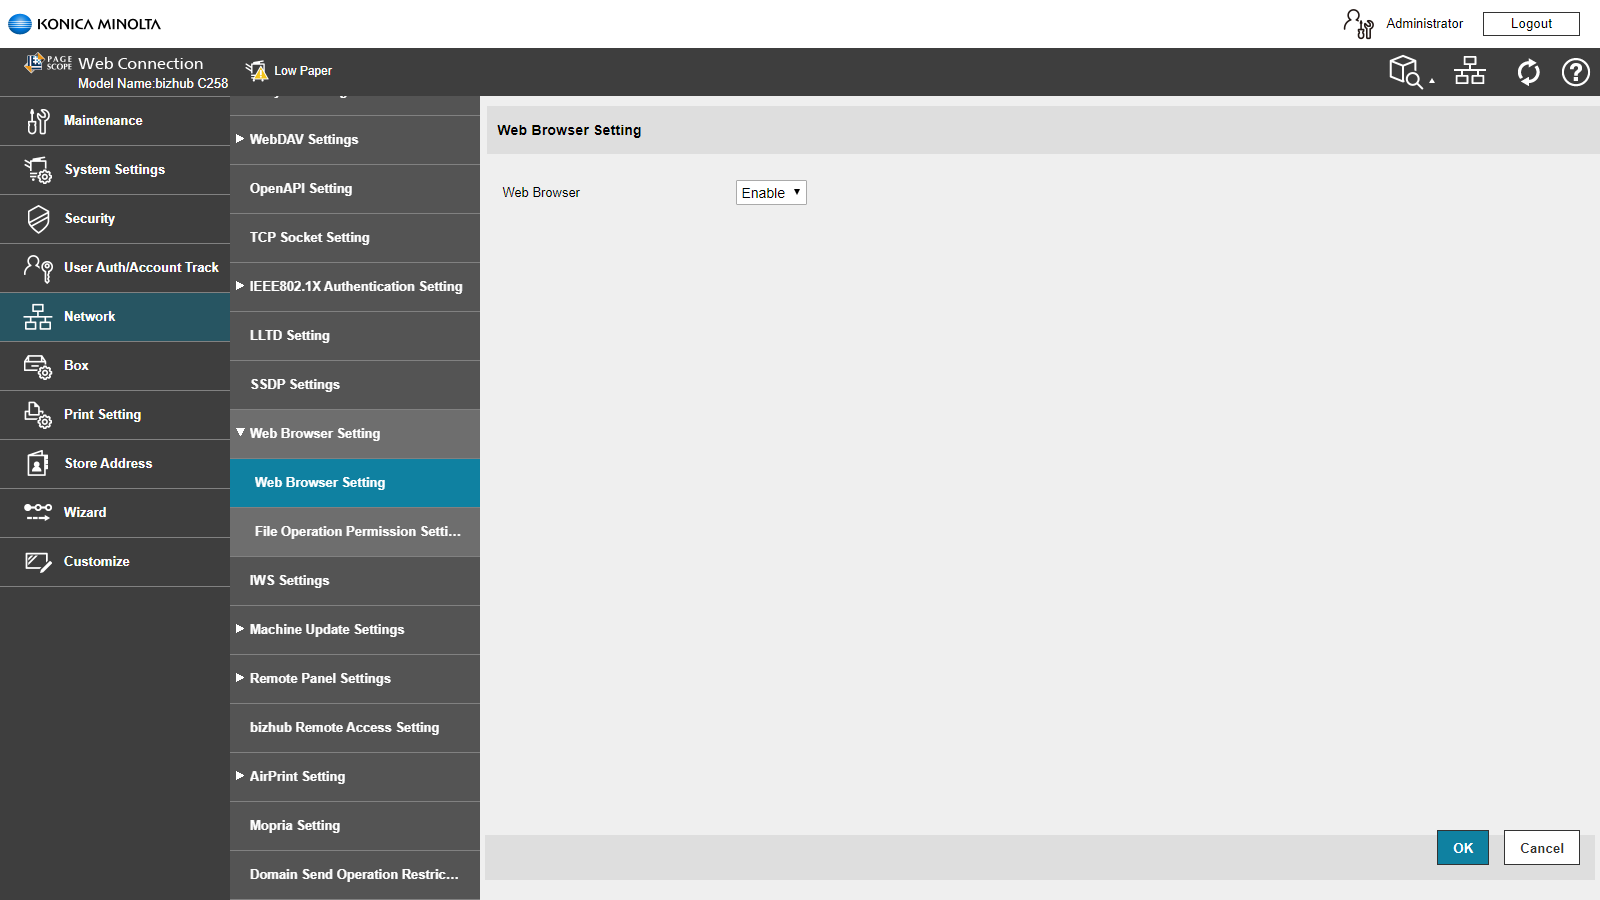
Enable Web Browser.
Go to Network -> Web Browser Setting -> Web Browser Setting.
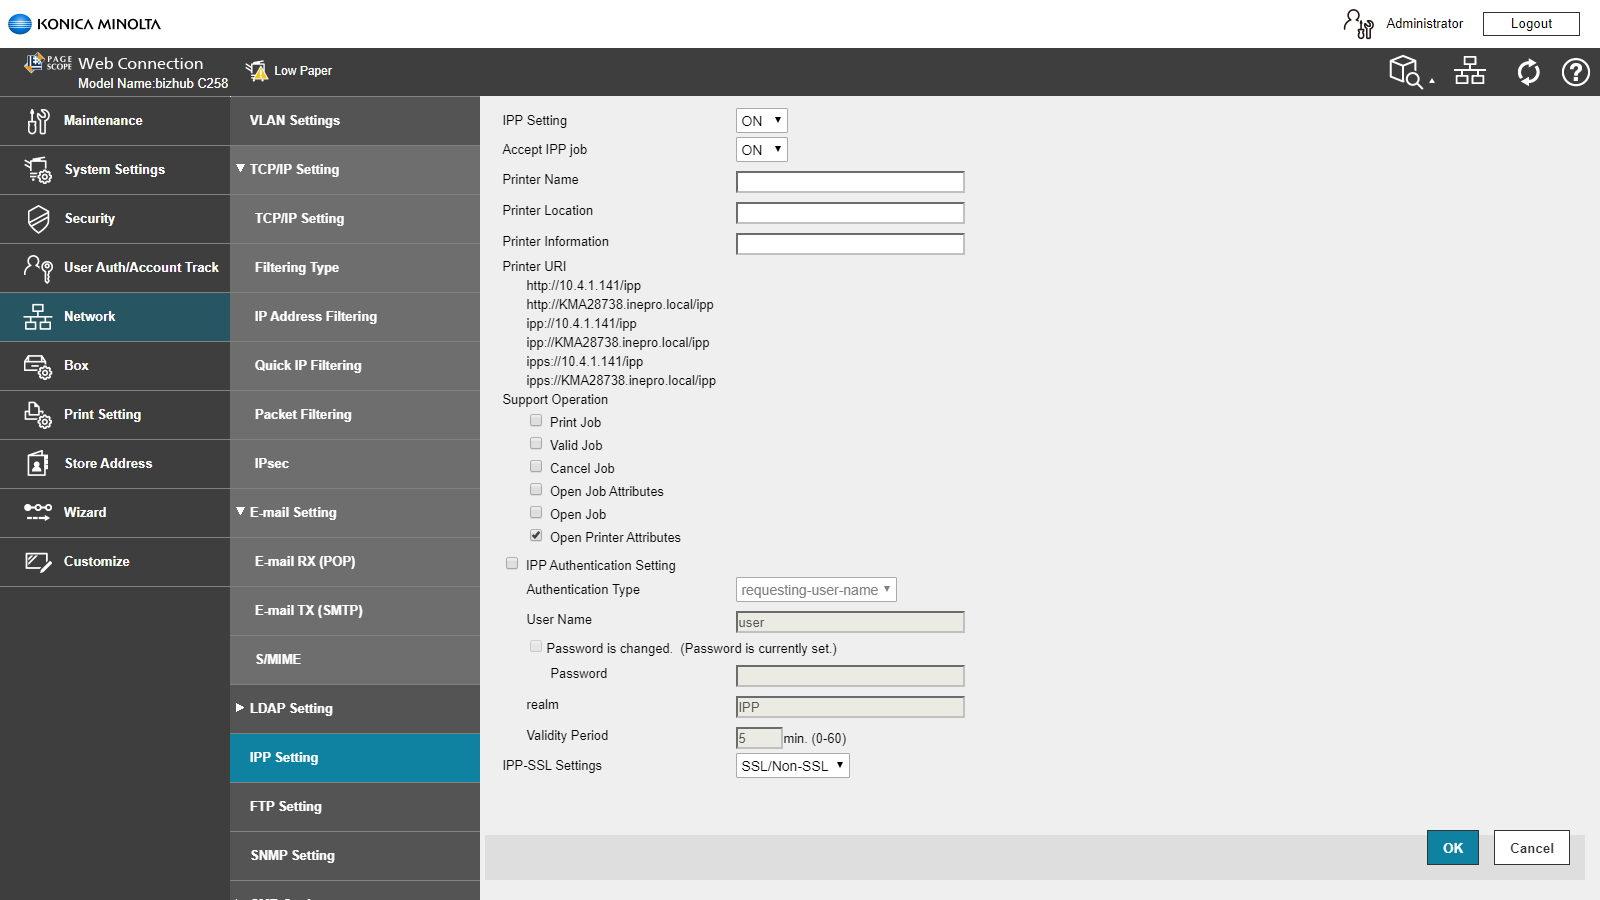
Set IPP Settings to ON.
Go to Network -> LDAP Setting -> IPP Setting.
Tick the box Open Printer Attributes.
Remove all other check in the other checkboxes.
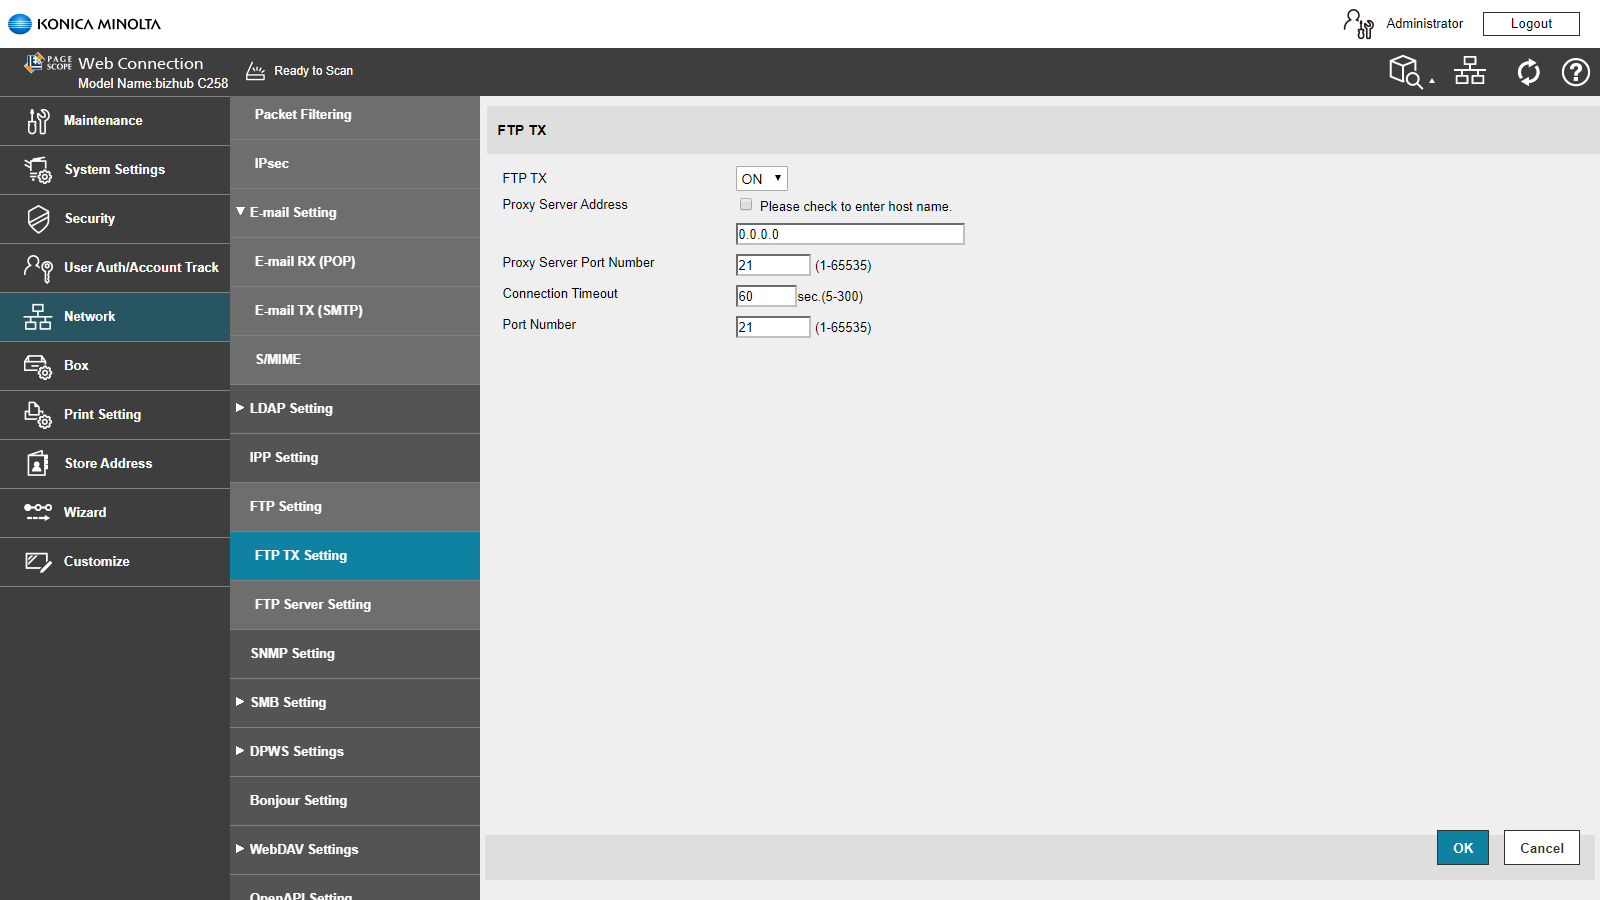
Set FTP TX to ON.
Go to Network -> FTP Setting -> FTP TX Setting.
Make sure the Proxy Server Port Number is 21 and the Connection Timeout is 60.
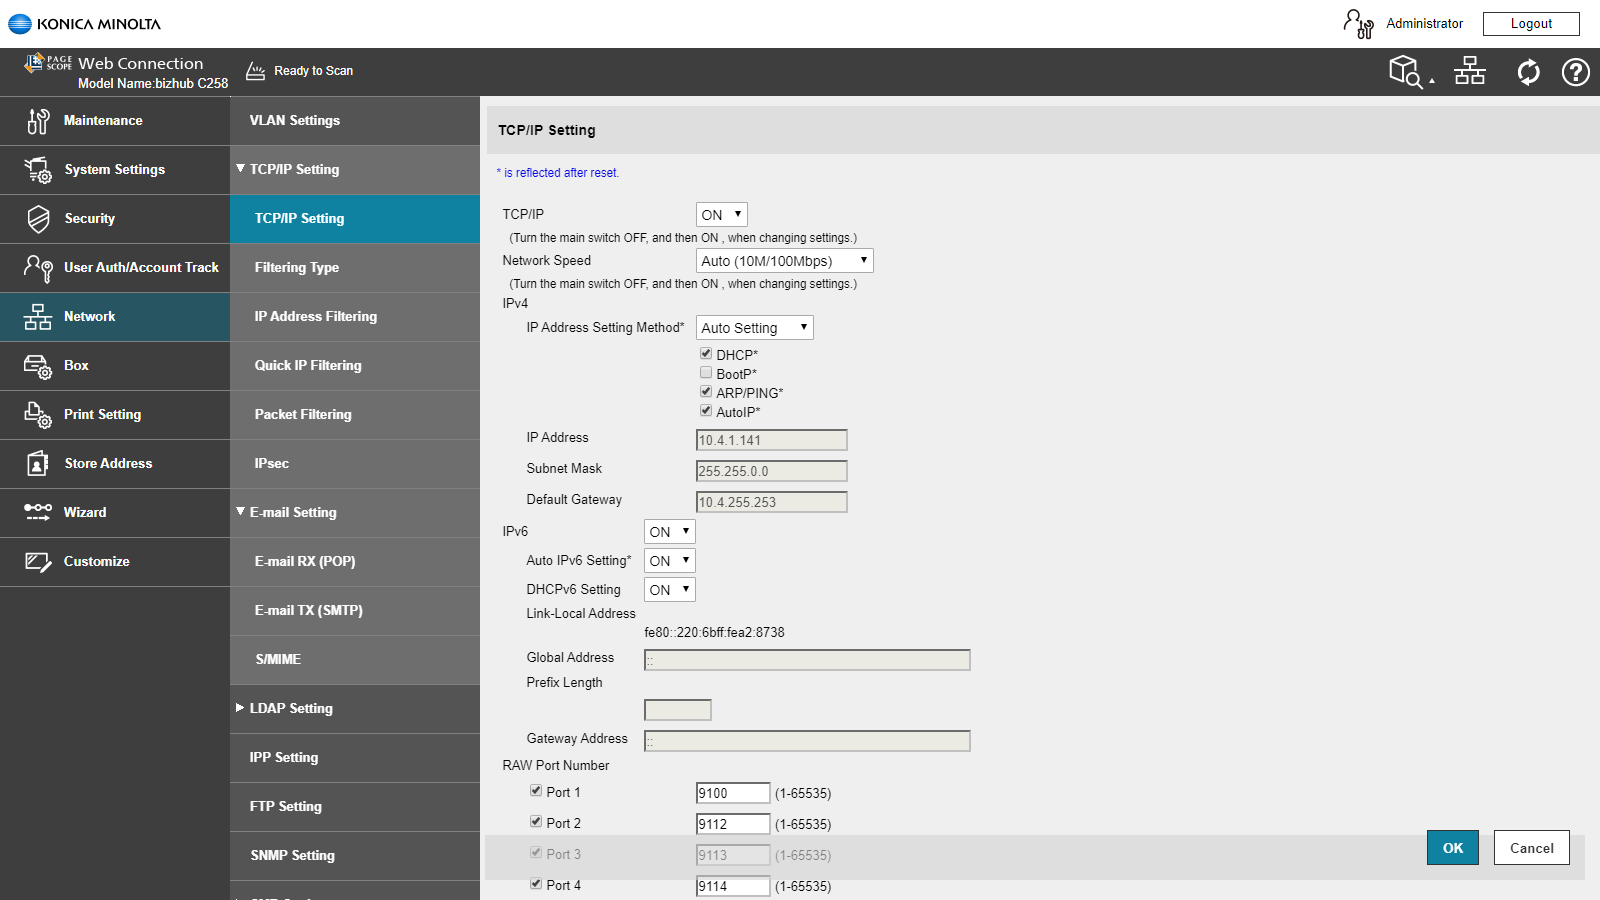
Go to Network -> TCP / IP Setting -> TCP / IP Setting.
Set TCP/IP to ON.
Make sure Port 1 is set to 9100.
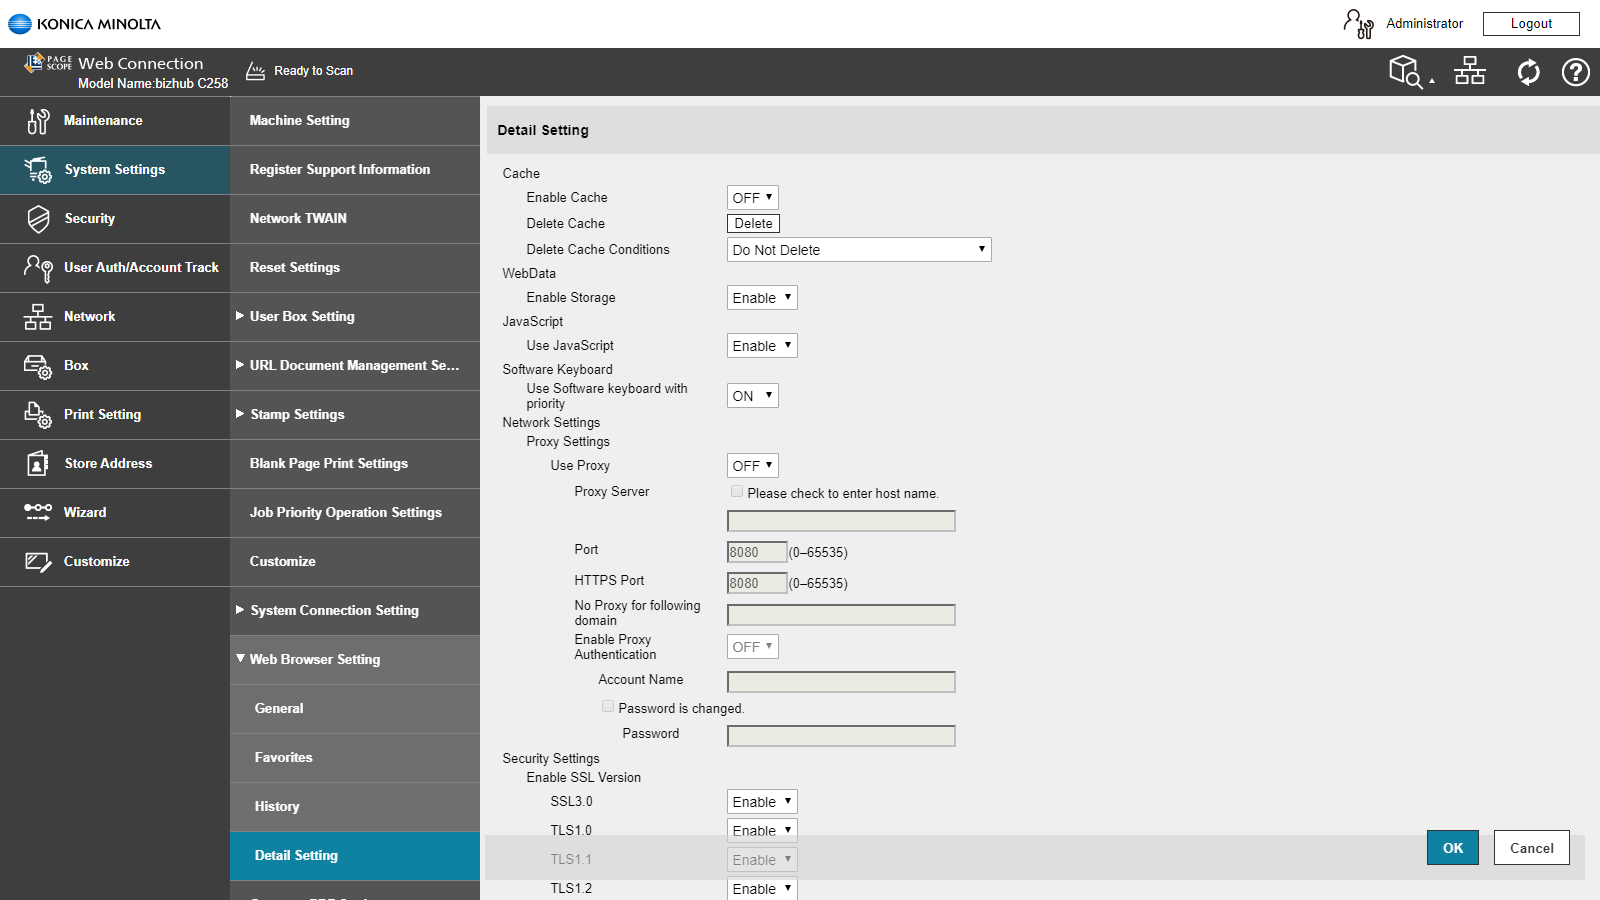
Go to System Settings -> Web Browser Settings -> Detail Settings.
Set WebData - Enable Storage to Enabled.
Set Use Javascript to Enable.
Set Enable Cache to OFF.
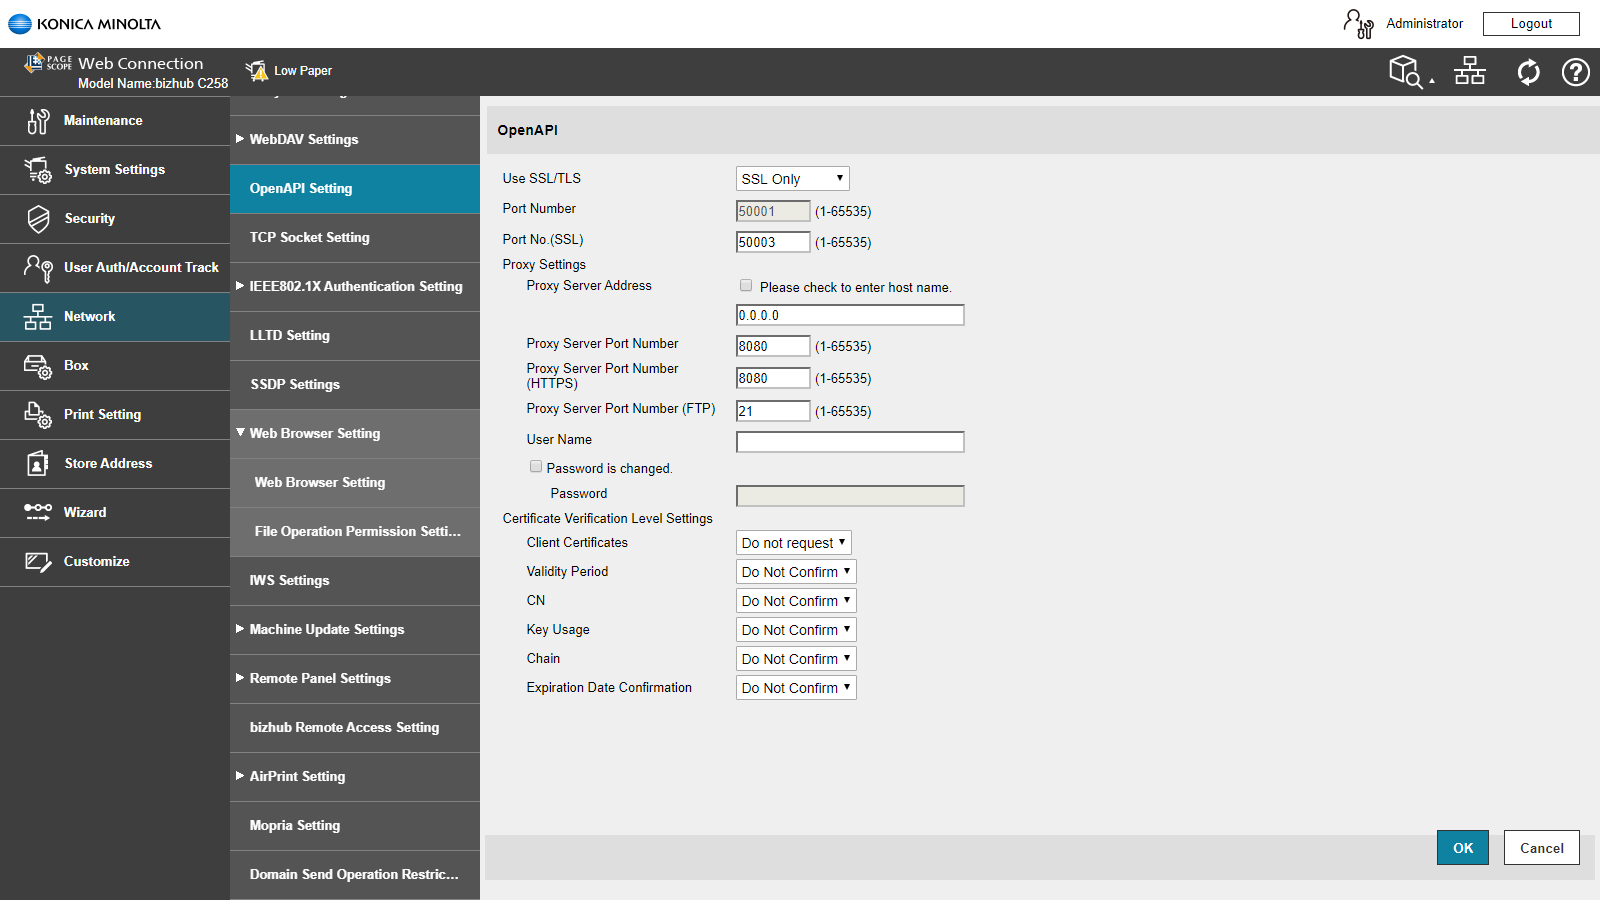
Go to Network -> Open API Setting.
Set SSL/Port Settings to SLL Only.
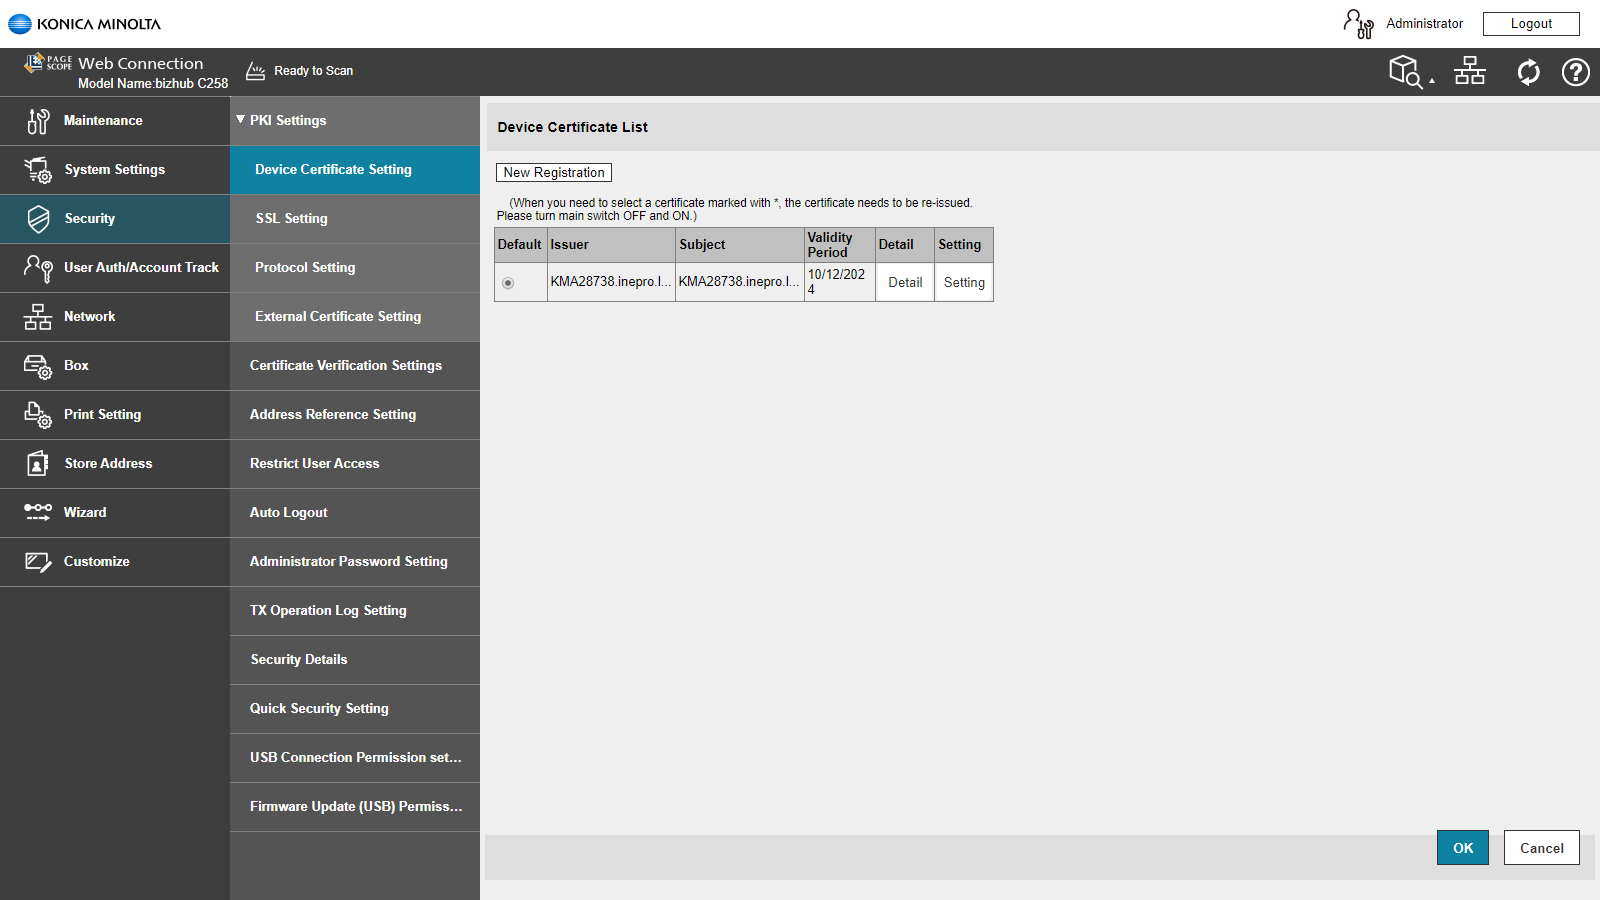
Go to Security -> PKI Settings -> Device Certificate Setting
If a valid certificate is present, this should be fine.
You should continue to the next step by clicking on this message.
Otherwise click New Registration
(continue with the right green arrow).
.png)
If you have a certificate prepared, select Import certificate. If you have not select Create and install a self-signed Certificate.
Select one now in this guide to continue to the next step.
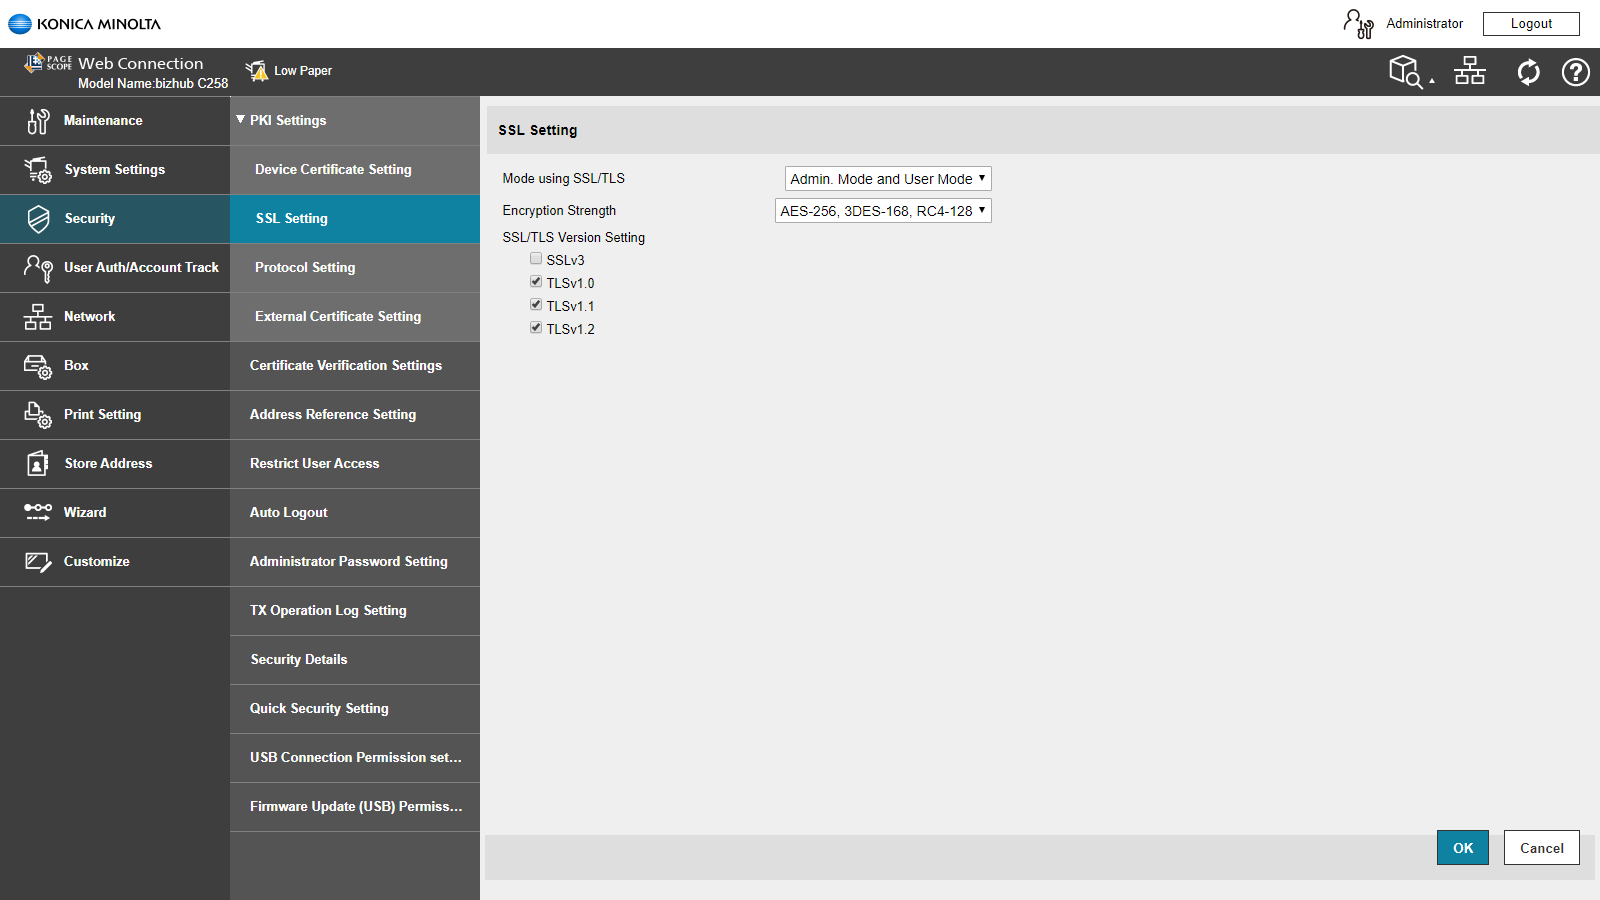
Go to Security -> PKI Settings -> Enable SSL Version.
Set Mode to Admin Mode and User Mode.
Set Encryption Strength to AES-356, 3DES-168, RC4-128. This ensures that the most secure option available will be used.

Select TCP Socket and click Edit.
Select OpenAPI and click Edit.
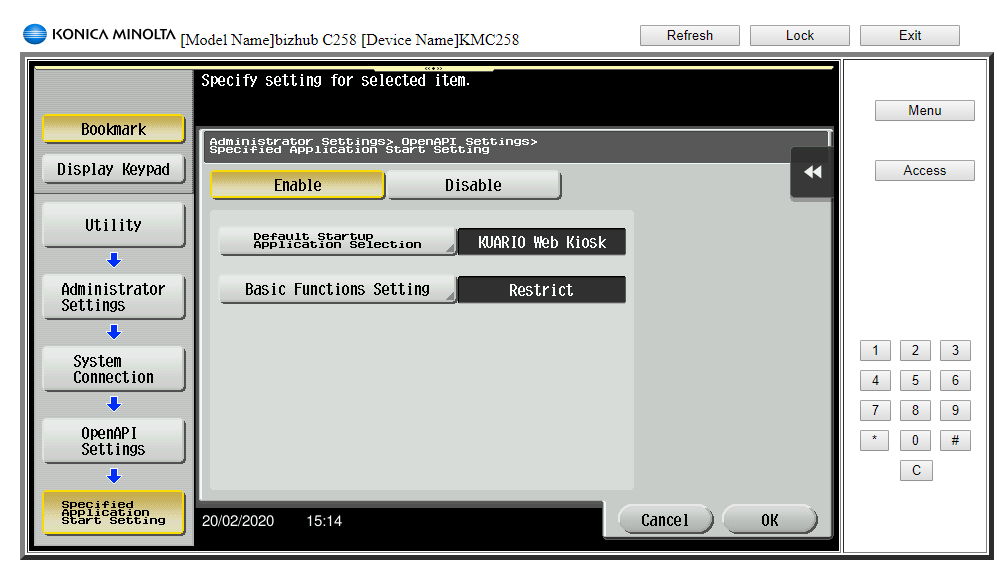
Go on the MFP to the Utility menu, using Adminstrator credentials,
Navigate to Network -> OpenAPI Settings -> Specified Application Start Settings.
Select KUARIO Web Kiosk as
Default Start Application.
Restrict Basic Function Seting.
Enable Specified Application Start Setting.
Go to IP Address Filtering.
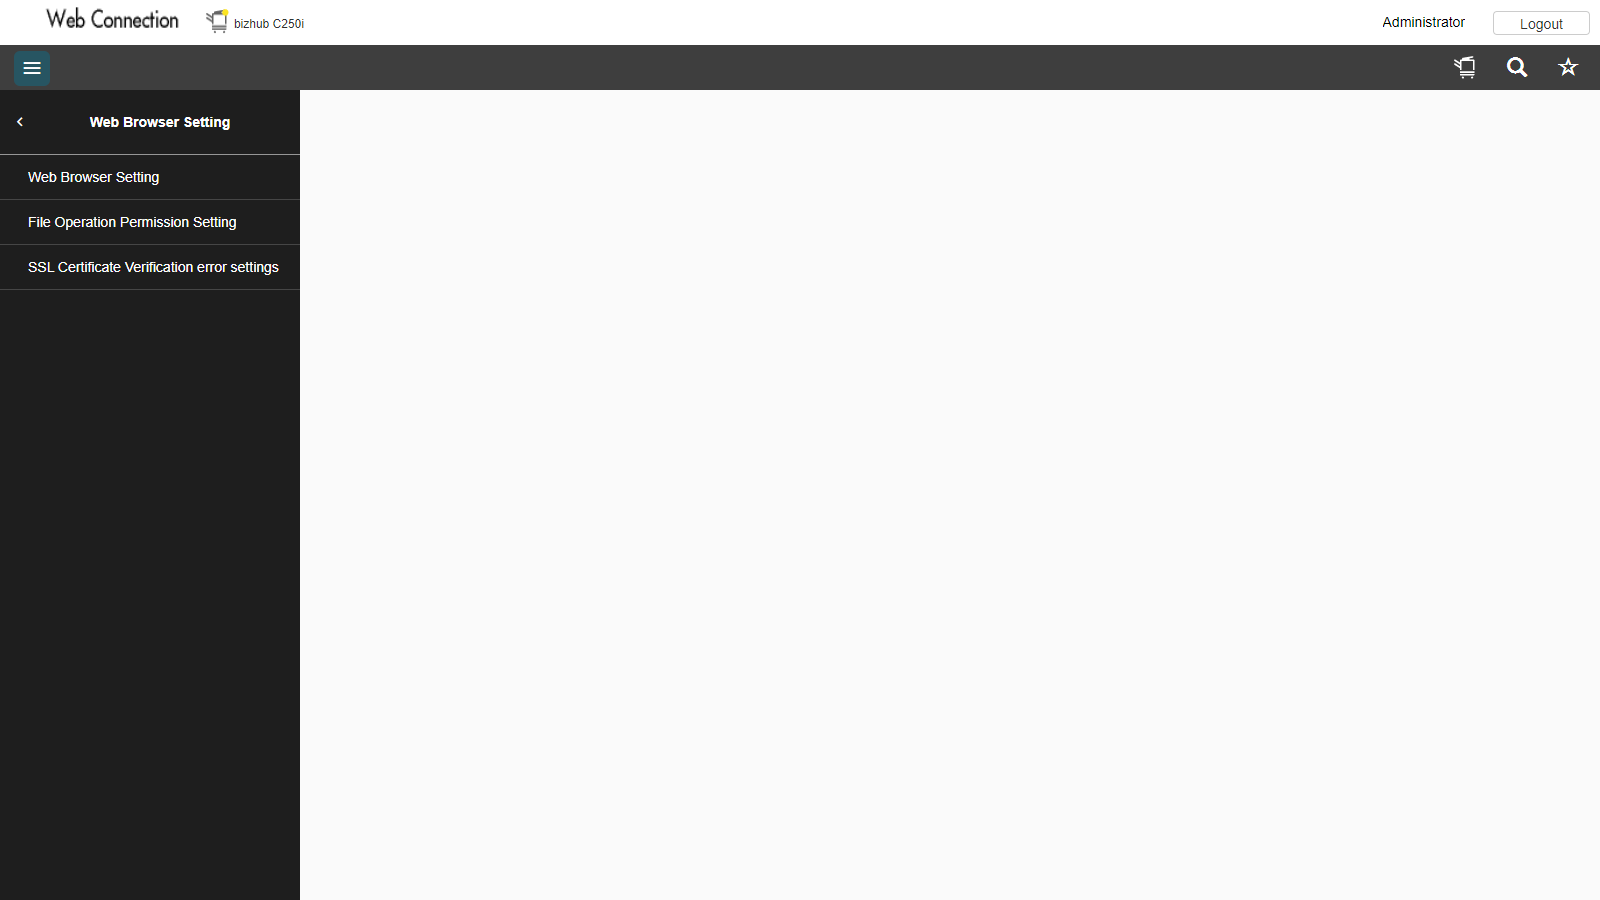
Go to Web Browser Settings.

Enable Web Browser.

Go to Network -> HTTP Server Settings.
Enable the IPP Setting.
Tick the box Open Printer Attributes.
Remove all other check in the other checkboxes.
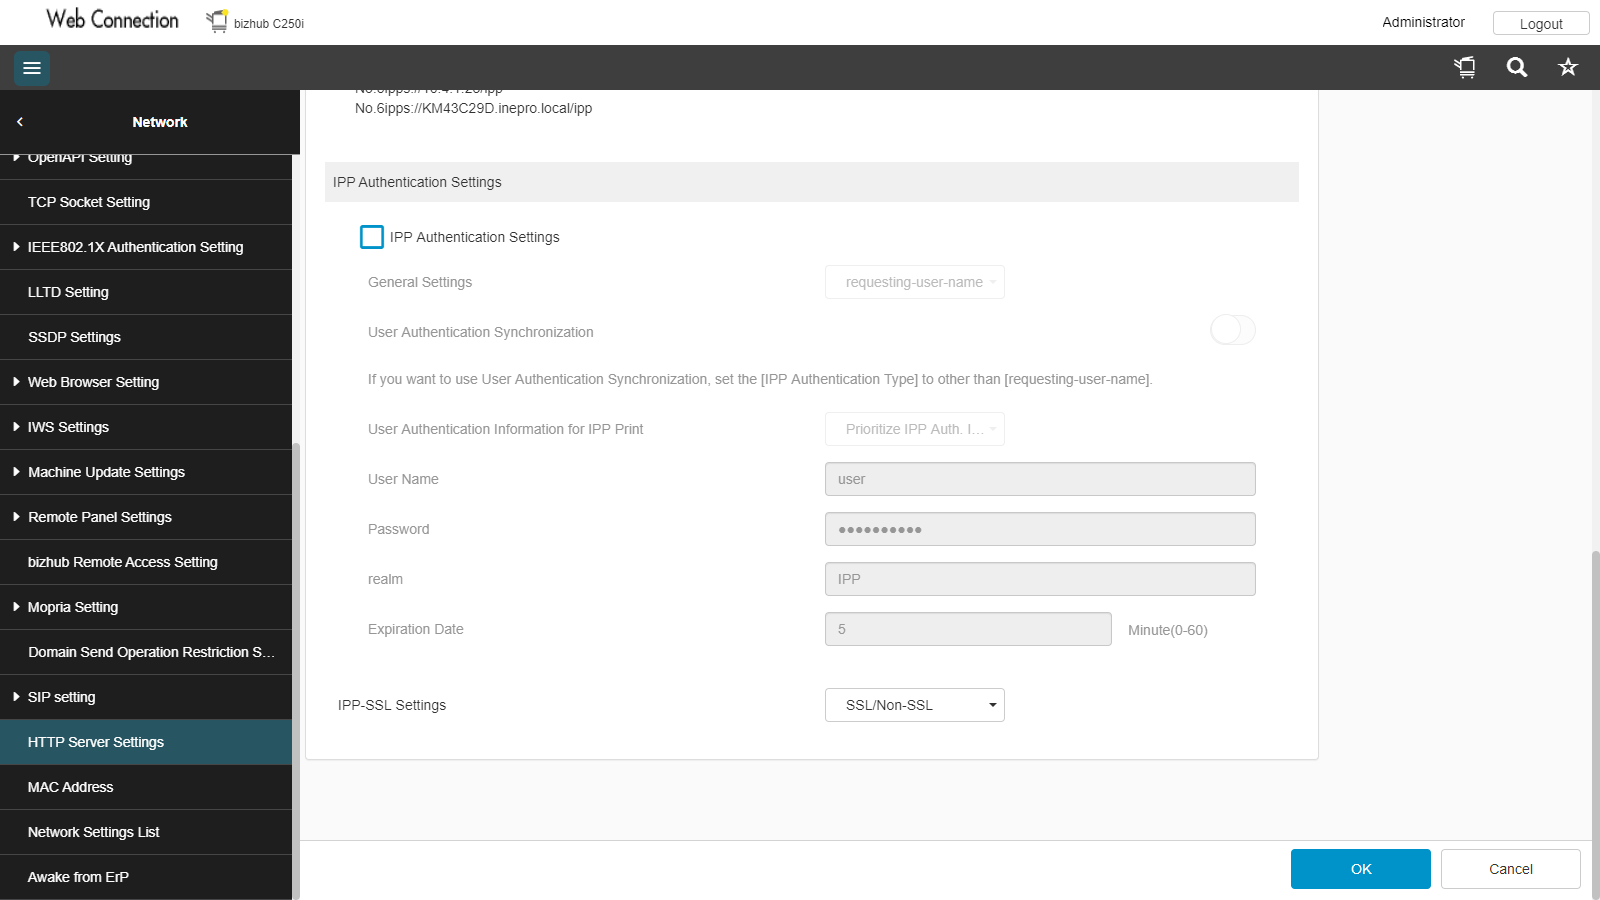
Disable IPP Authentication Setting.
Set IPP-SSL Setting to SSL/Non-SSL
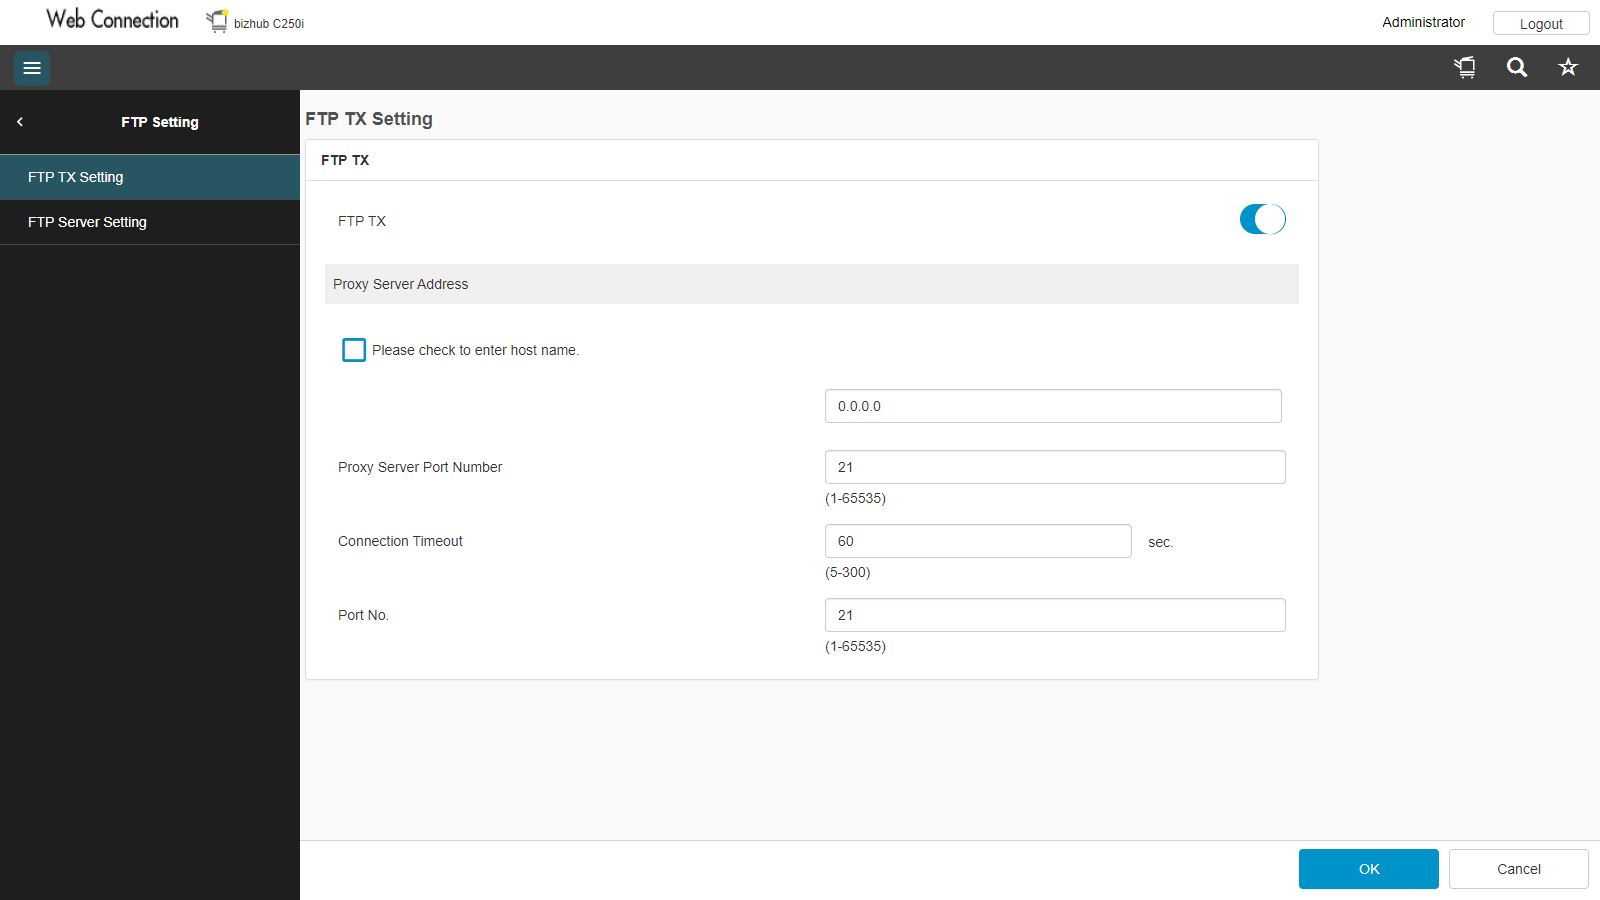
Go to Network -> FTP Setting -> FTP TX Setting.
Enable FTP TX.
Make sure the Proxy Server Port Number is 21 and the Connection Timeout is 60.
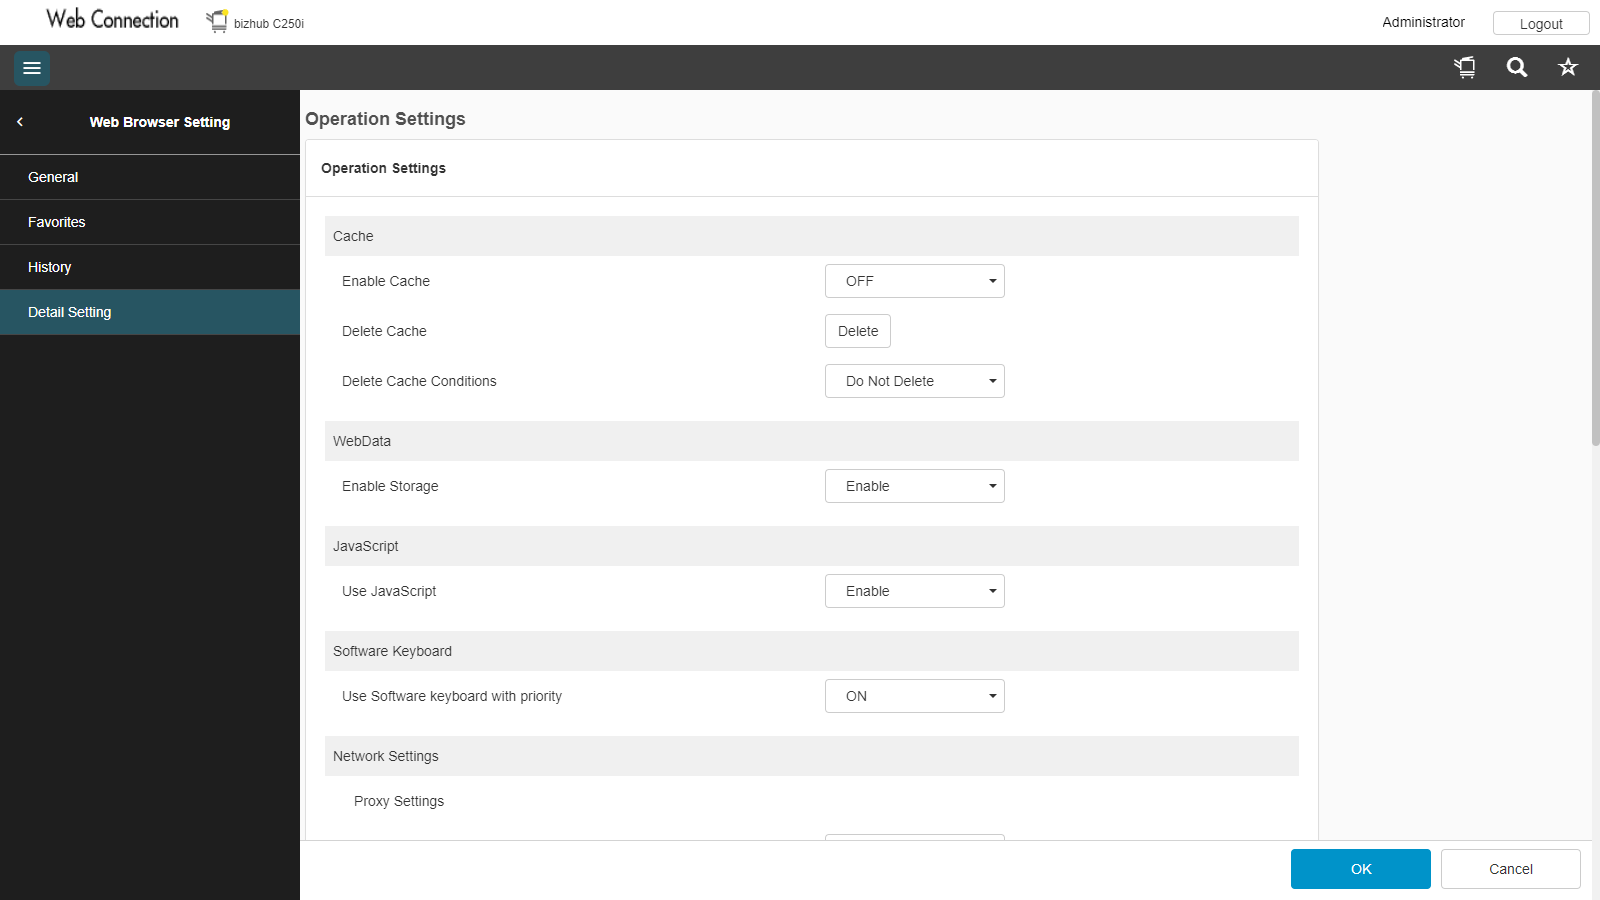
Go to System Settings -> Web Browser Settings -> Detail Settings.
Set Enable Cache to OFF.
Set Enable Cache to OFF.
Set Enable Cache to OFF.
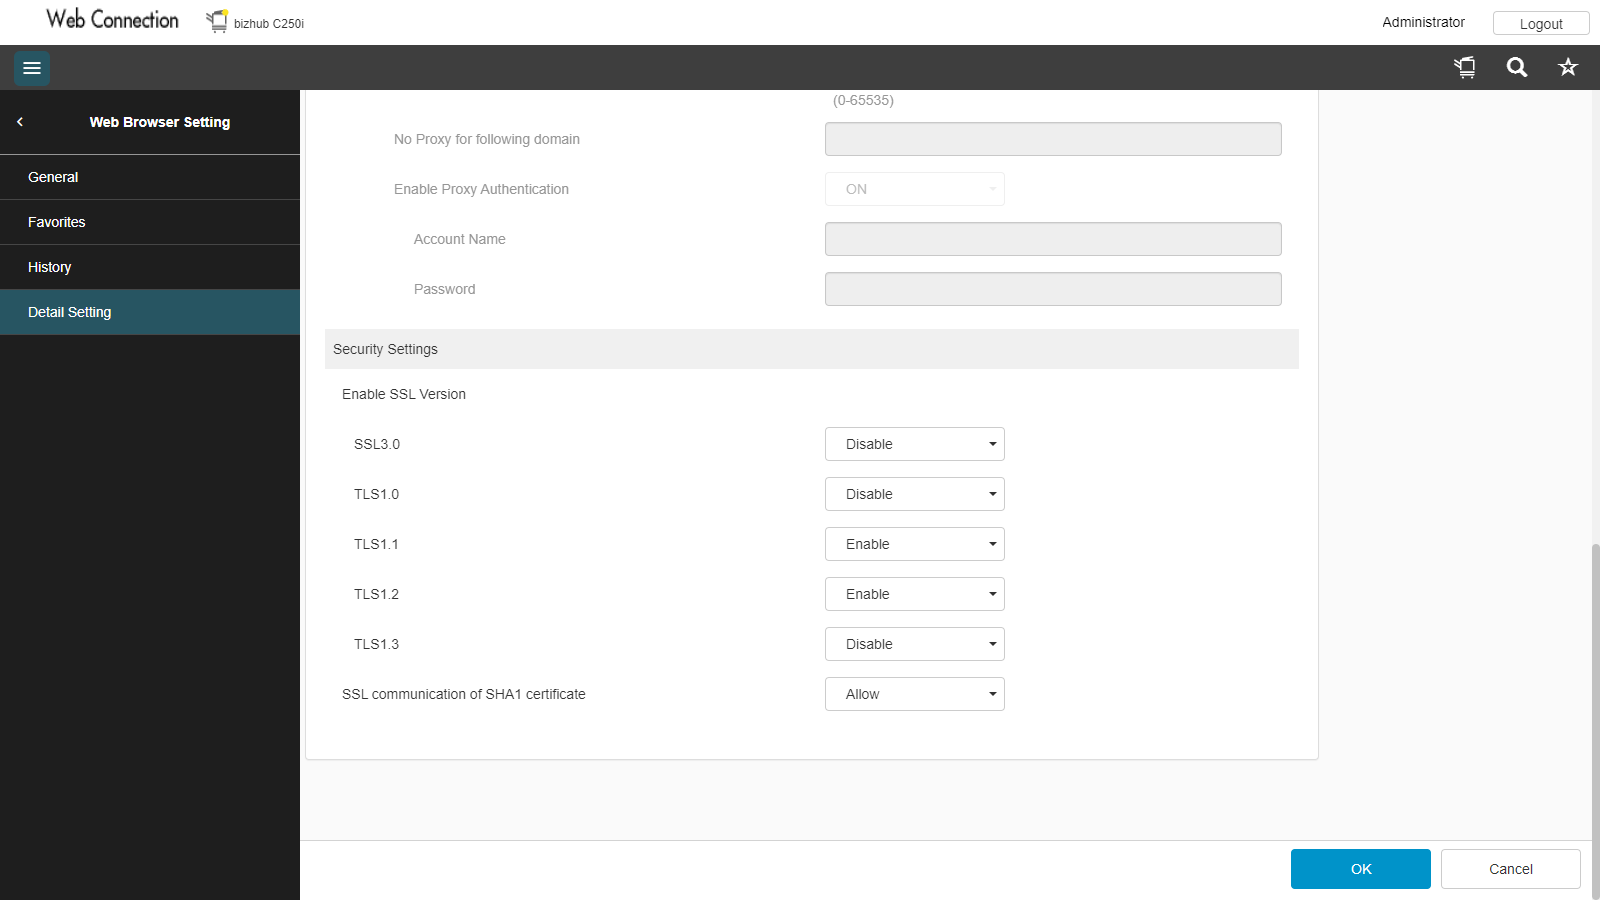
Scroll down.
Set TLS1.2 to Enable.
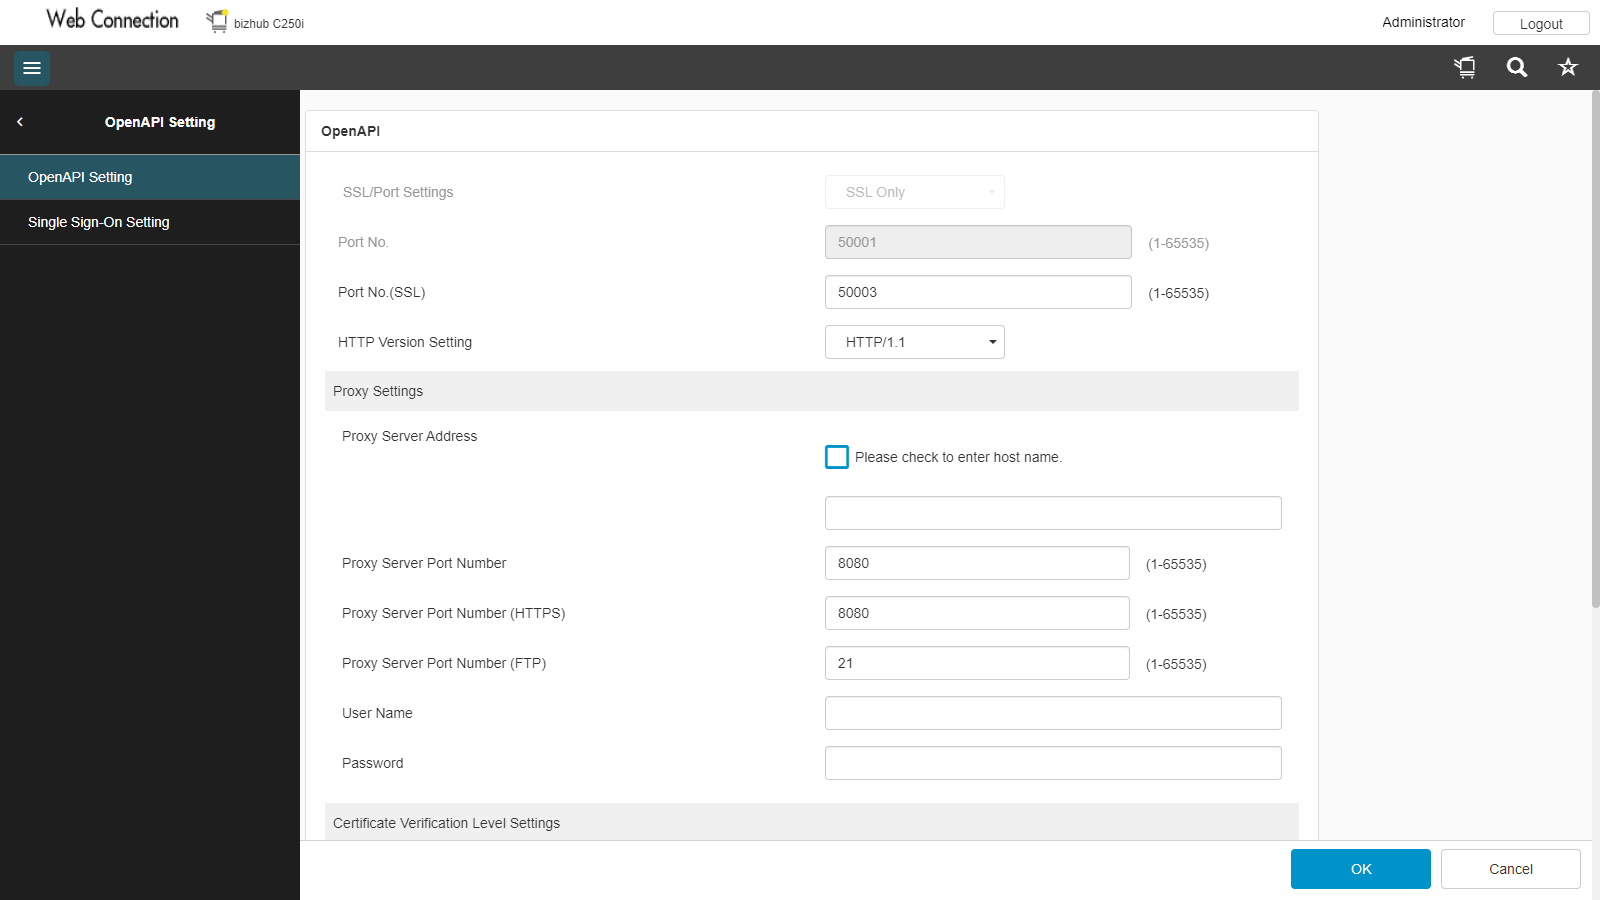
Go to Network -> Open API Setting.
Set SSL/Port Settings to SLL Only.

Go to Security -> PKI Settings -> Device Certificate Setting
If a valid certificate is present, this should be fine.
You should continue to the next step by clicking on this message.
Otherwise click New Registration
(continue with the right green arrow).
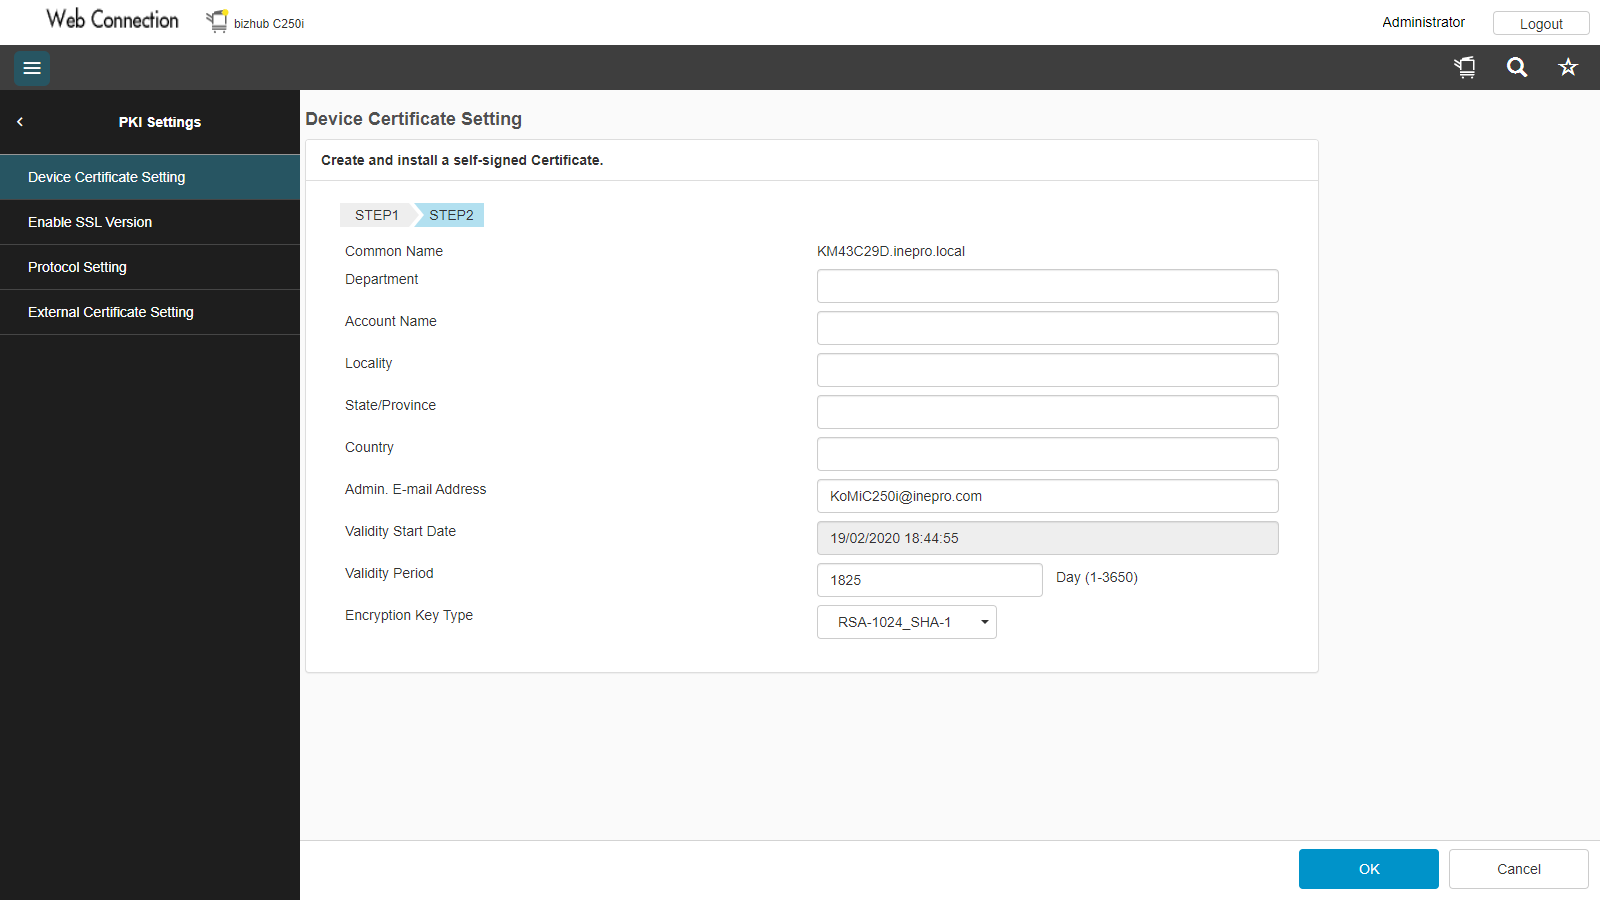
Fill in all the fields and finish the self-signed certificate process.
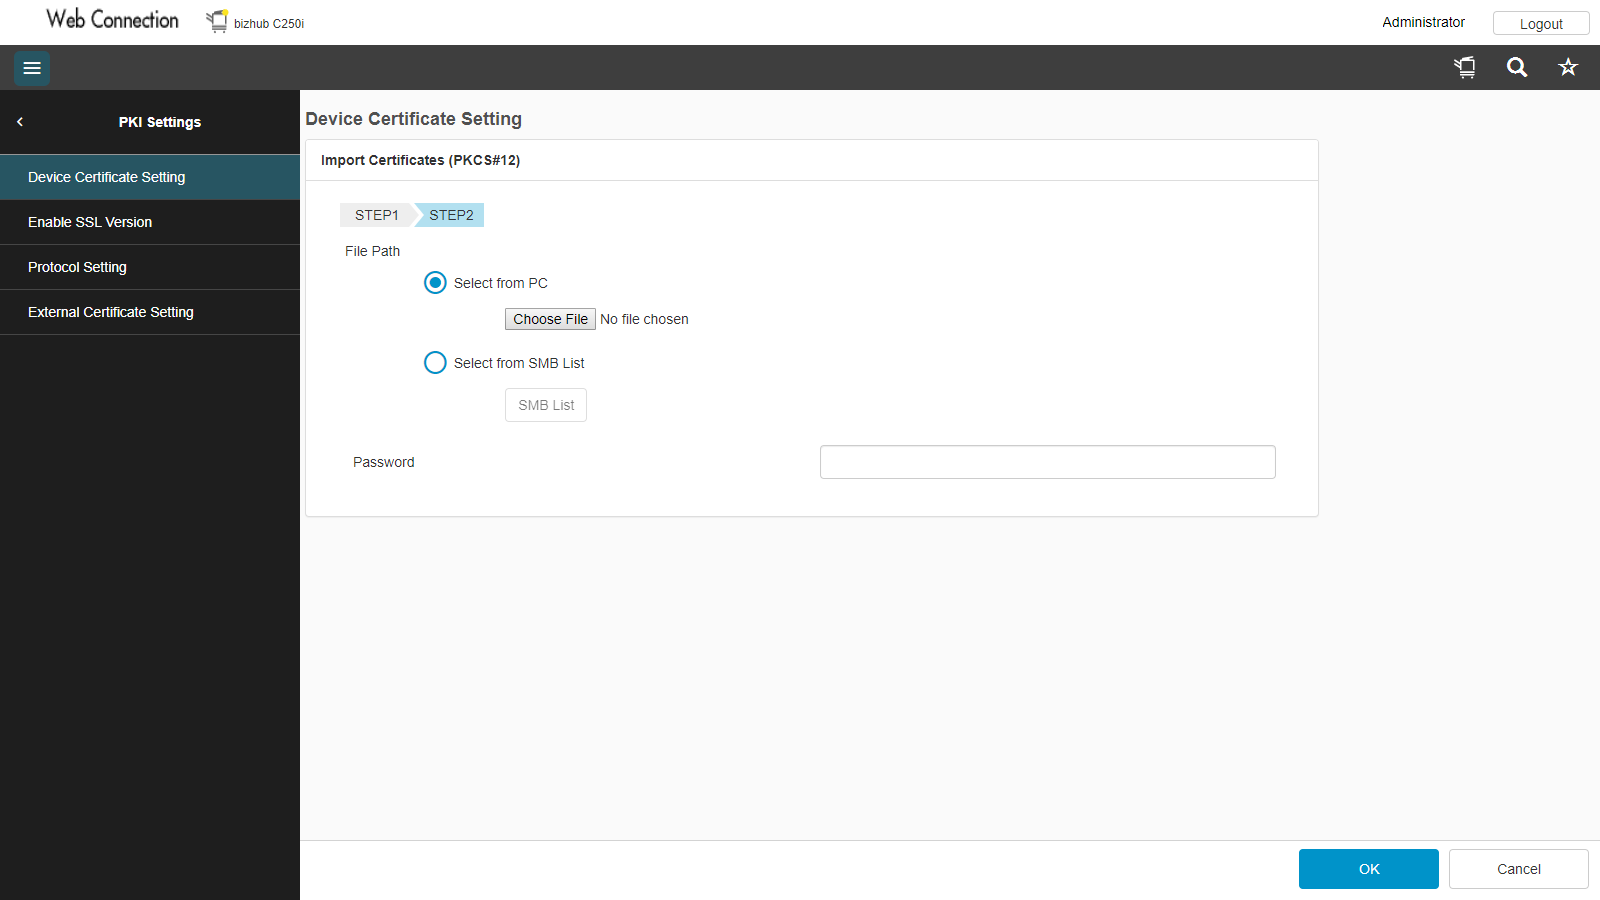
Select the file from the PC and finish the import certificate process.
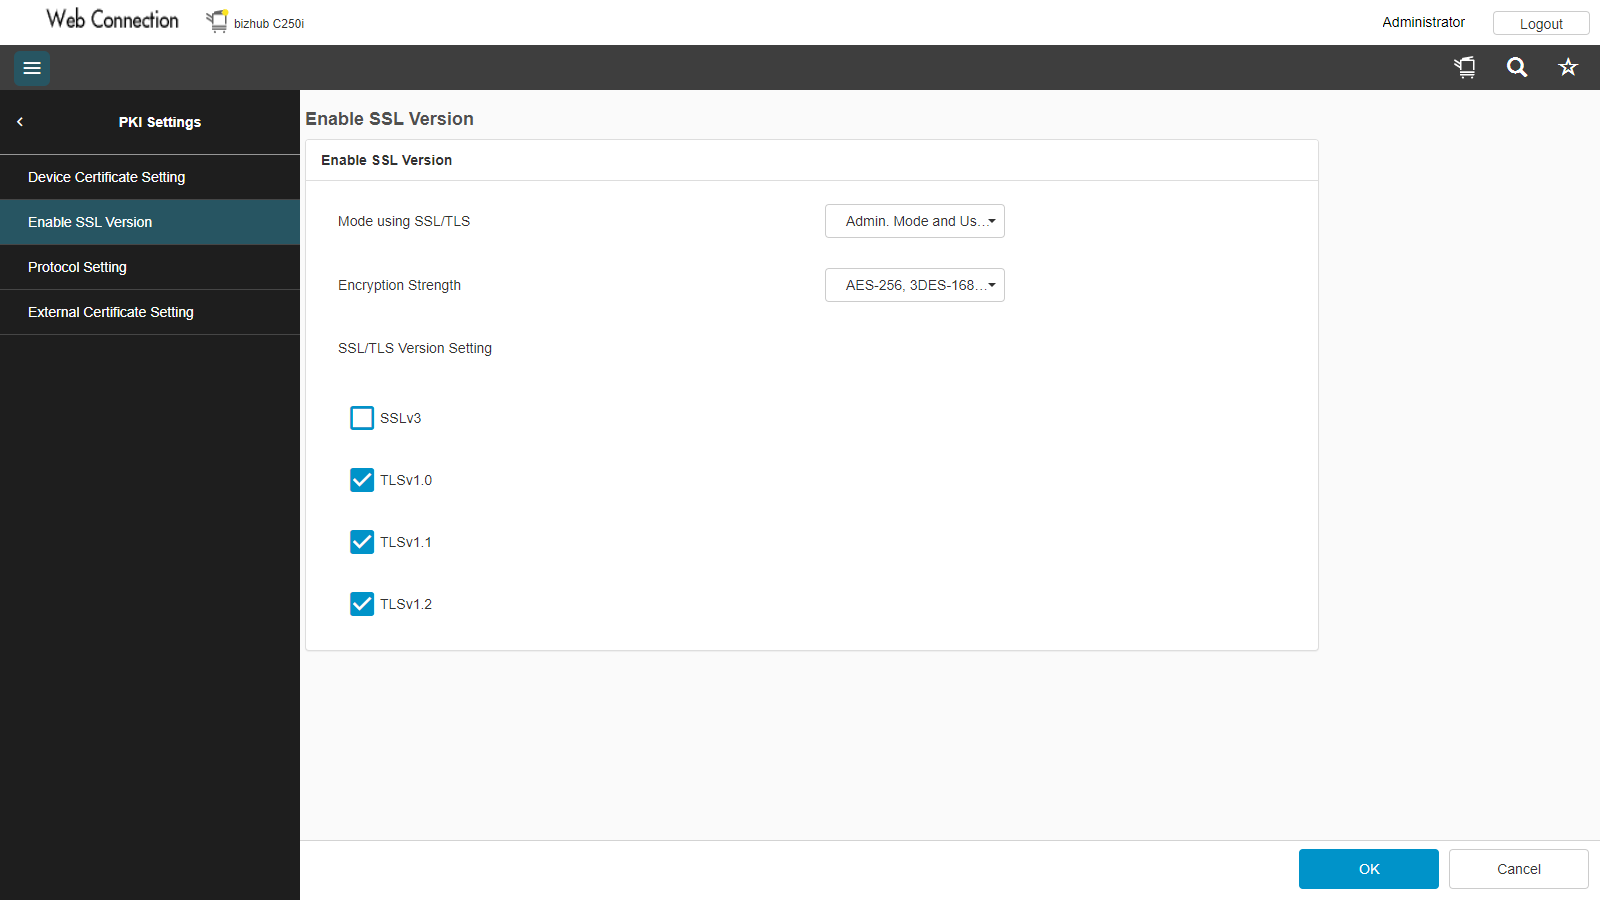
Go to Security -> PKI Settings -> Enable SSL Version.
Set Mode to Admin Mode and User Mode.
Set Encryption Strength to AES-356, 3DES-168, RC4-128. This ensures that the most secure option available will be used.
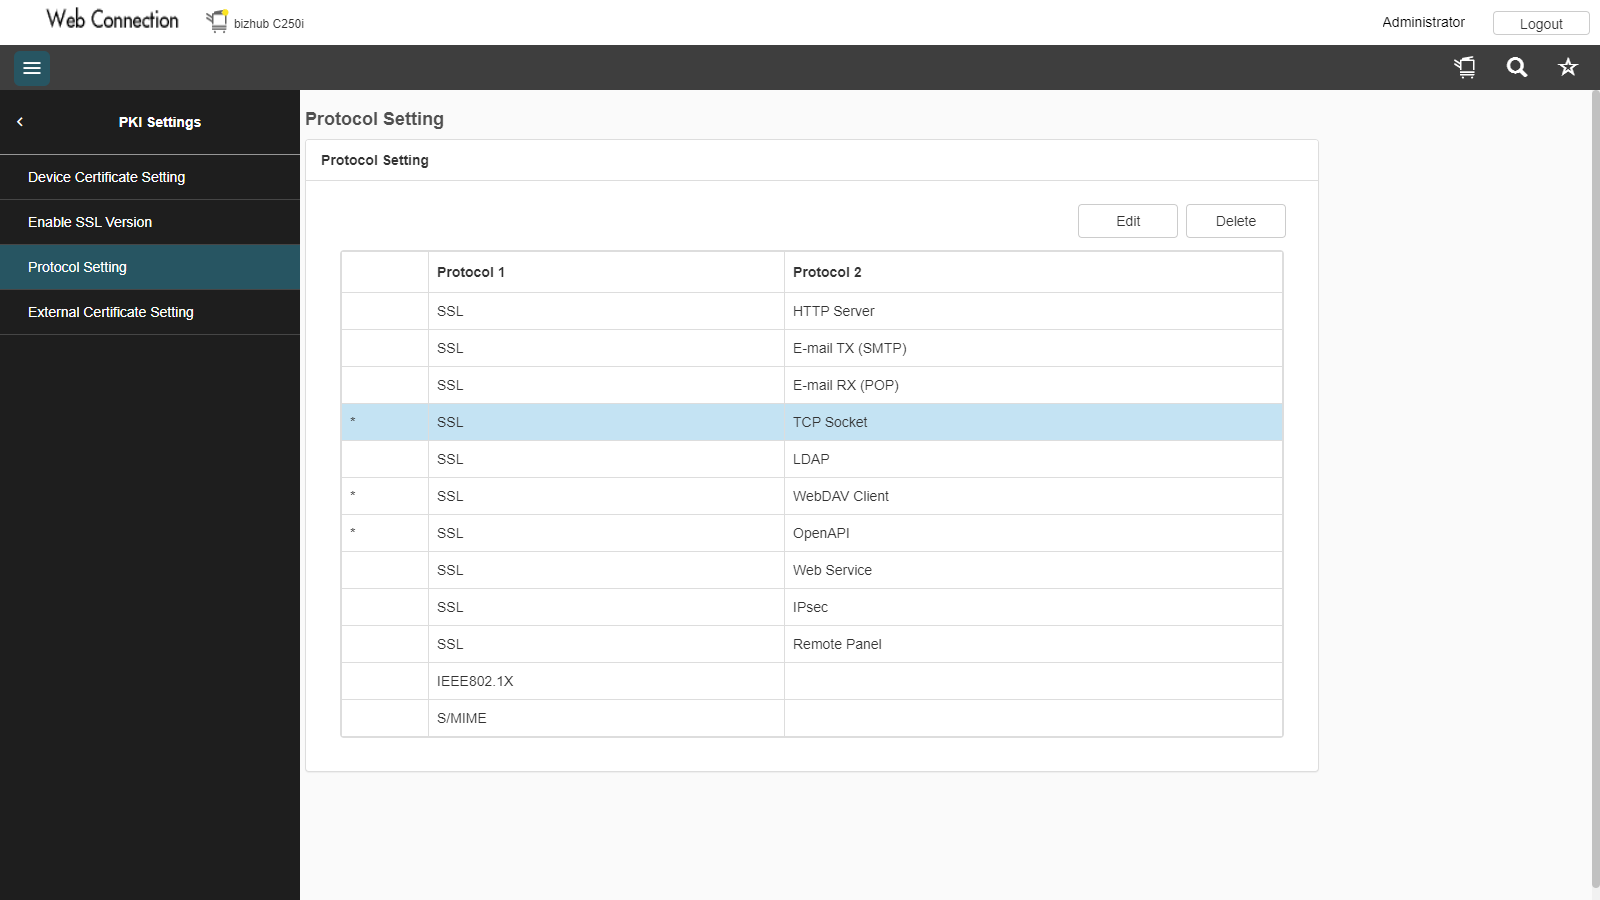
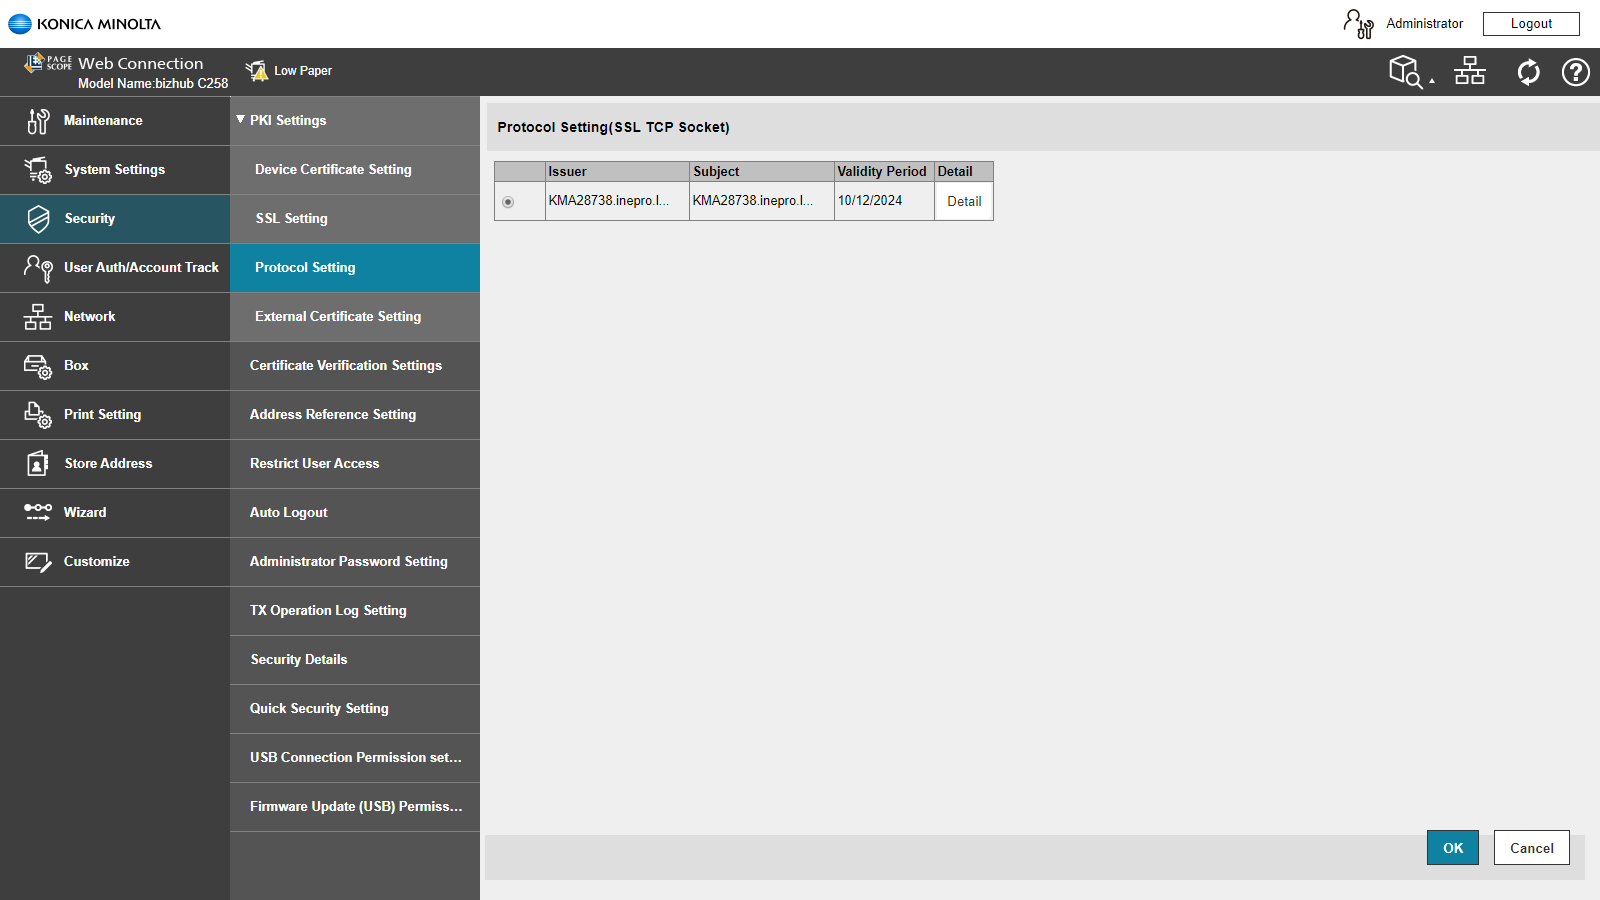
Go to Security -> PKI Settings -> Protocol Settings.
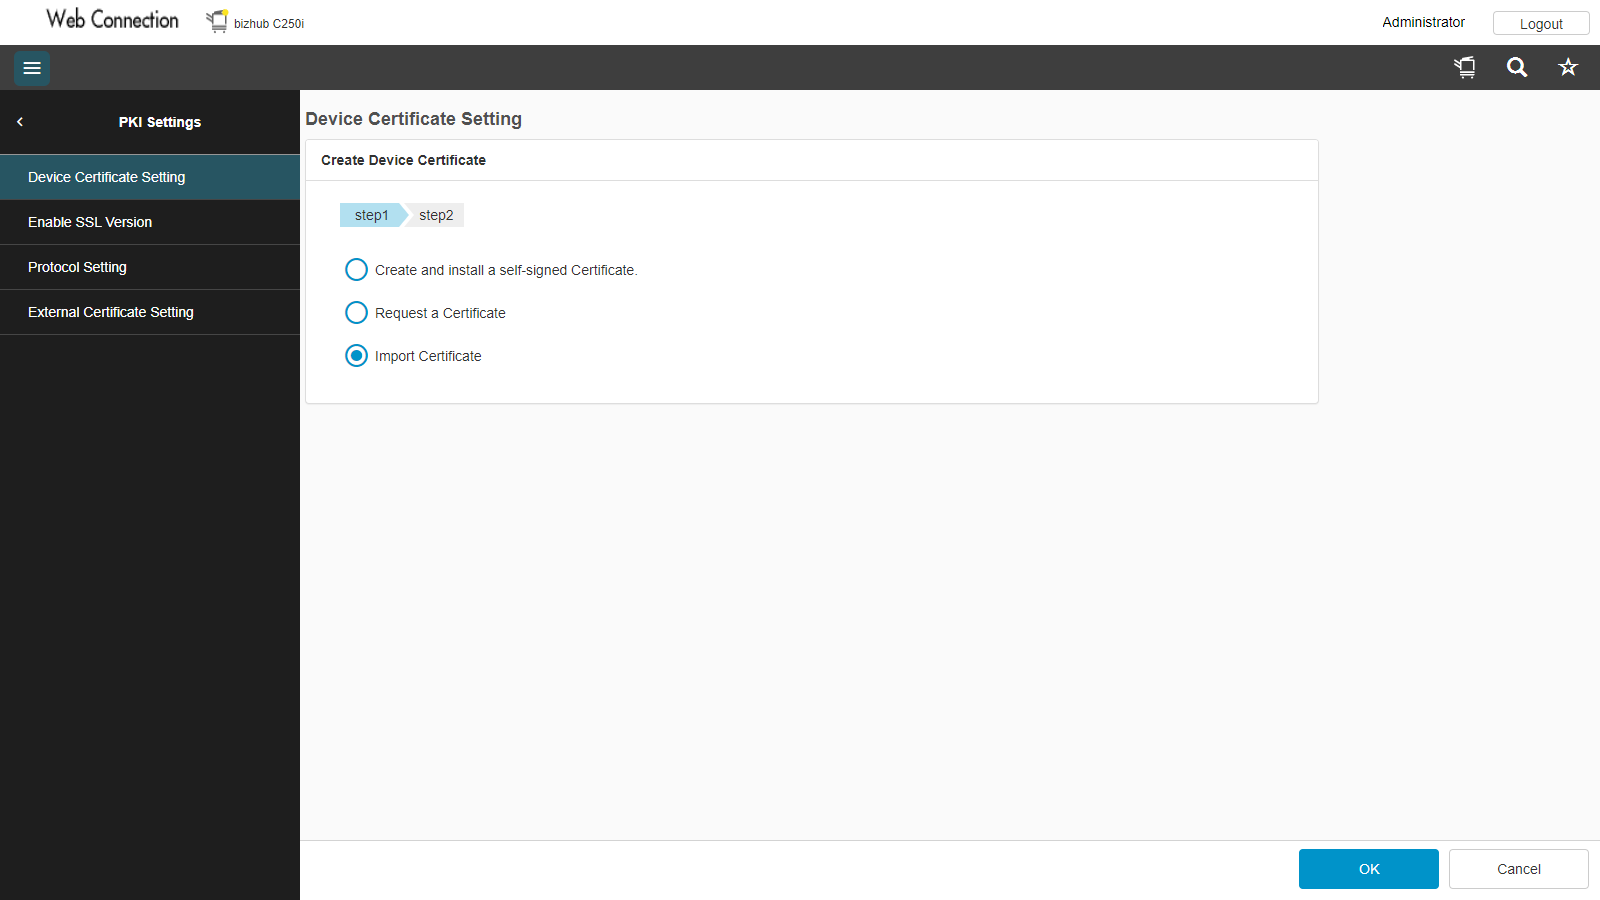
If you have a certificate prepared, select Import certificate. If you have not select Create and install a self-signed Certificate.
Select one now in this guide to continue to the next step.
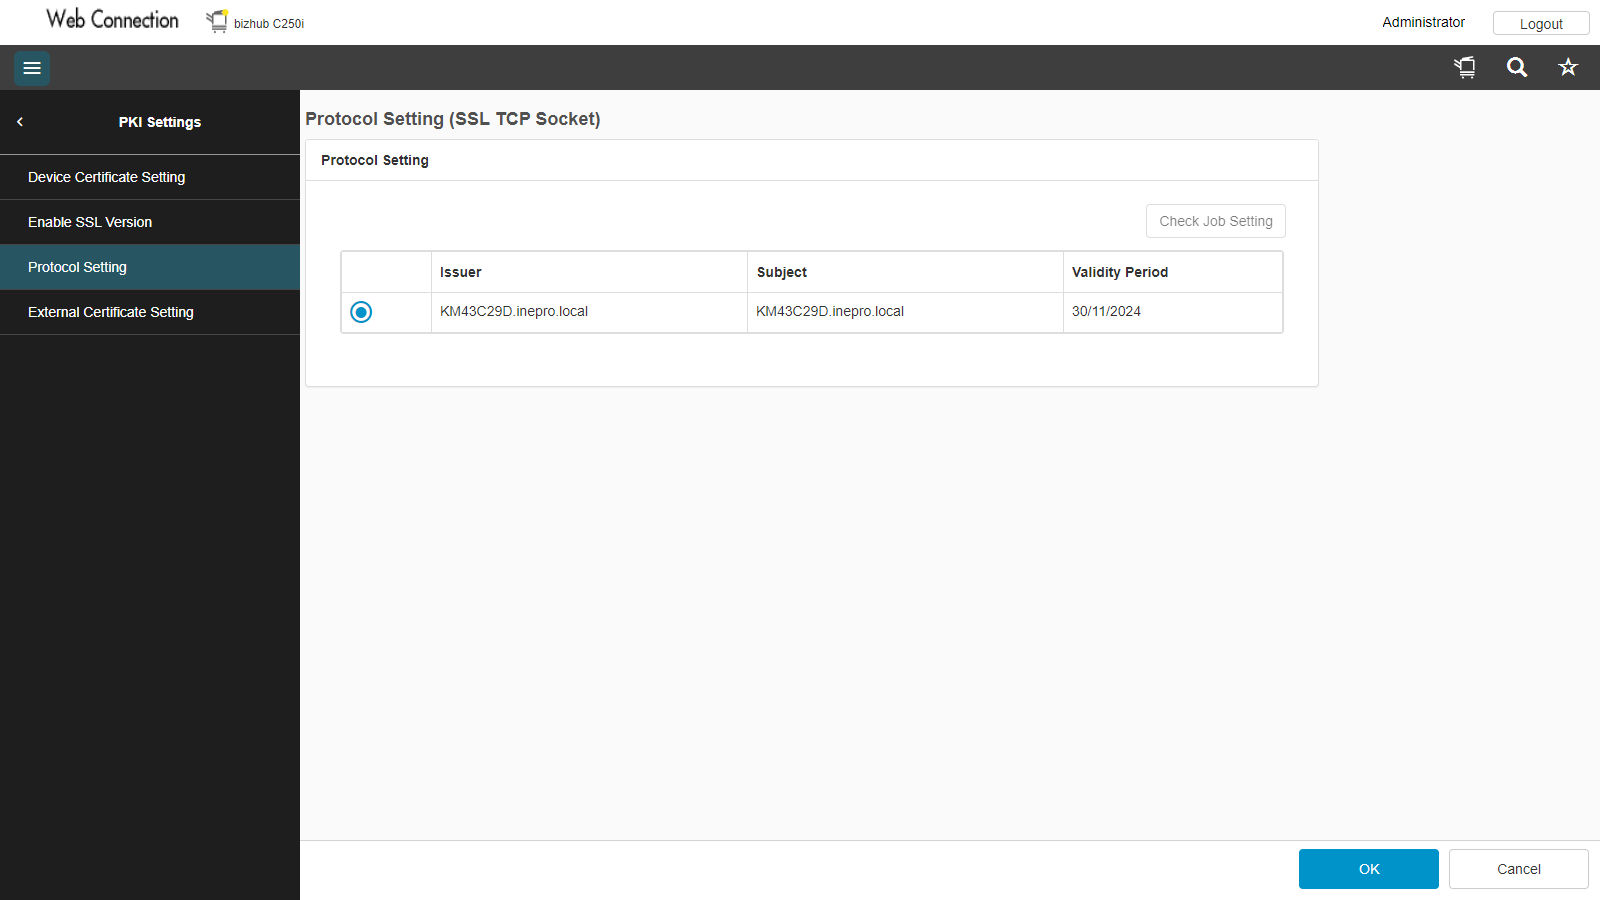
Select TCP Socket and click Edit.

Make the certificate you selected earlier is also the certificate you have selected here.
Naturally the certificate must be valid.

Select OpenAPI and click Edit.
Make the certificate you selected earlier is also the certificate you have selected here.
Naturally the certificate must be valid.
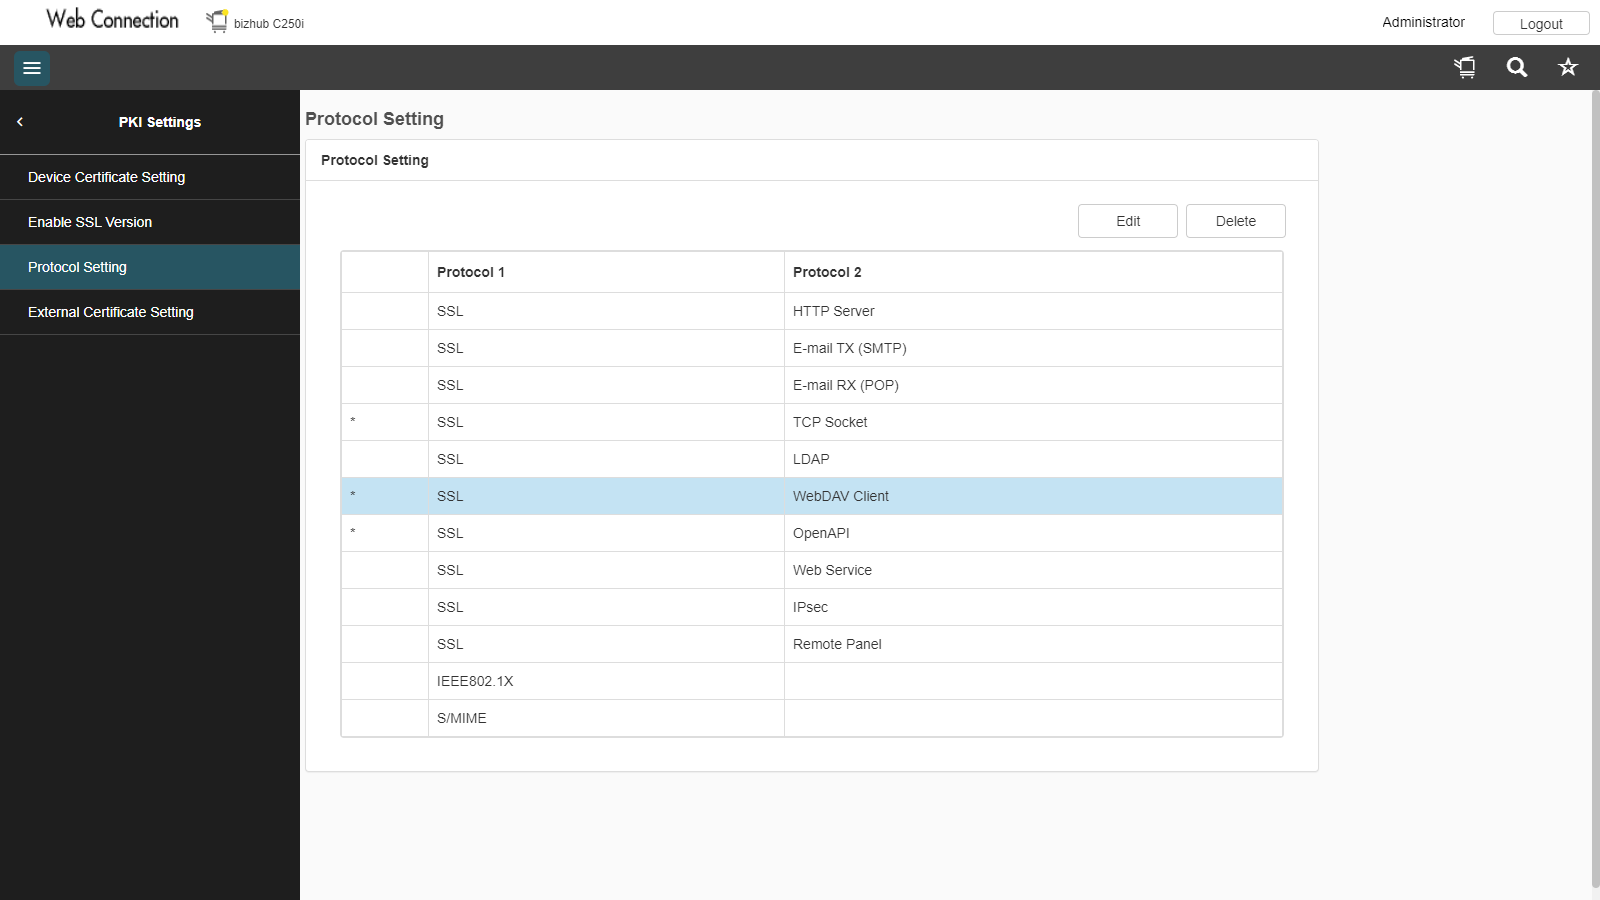
Select WebDAV and click Edit. (optional WebDAV might not be used)

Make the certificate you selected earlier is also the certificate you have selected here.
Naturally the certificate must be valid.
Activation Konica Kiosk
Dear KUARIO Support,
Could you help me with the activation of my Konica device?
1. Organization name: My Organization
2. Currency Used: Euro
3. Country of this Outlet: The Netherlands
4. Name of this Outlet: <The name by which I recognise this Konica device>
5. MAC-address of KUARIO Smart Connector: 00:AA:BB:CC:DD:EE <--Do not use this example but the address of your Smart Connector!
6. The IP-address of your Konica Device: 10.4.1.106 <--Do not use this example but the address of your Konica Device
7. The Konica device's Administrator credentials: admin | my$ecretPa$$VVord <--Do not use this example but the login credentials of your Konica device
Kind regards,
me
Confirm to shut down by clicking yes. When MFP is completly shut down, power the MFP up, using the On/Off button on the panel.
To reboot the MFP, click the On/Off button on the panel.
Note! The MFP must be rebooted to finish the setup process. Please reboot the MFP using the On/Off button on the panel.
You now have almost concluded the installation.
Now you need to wait for KUARIO Support to setup the KUARIO Smart Connector. This may take up to two work days.
When you get the confimation that the KUARIO Smart Connector is ready for use, continue with the final step.
Note! The next steps MUST be executed on the MFP, these settings can not be found or edited remotely!
Go to the MFP and log in as Administrator.
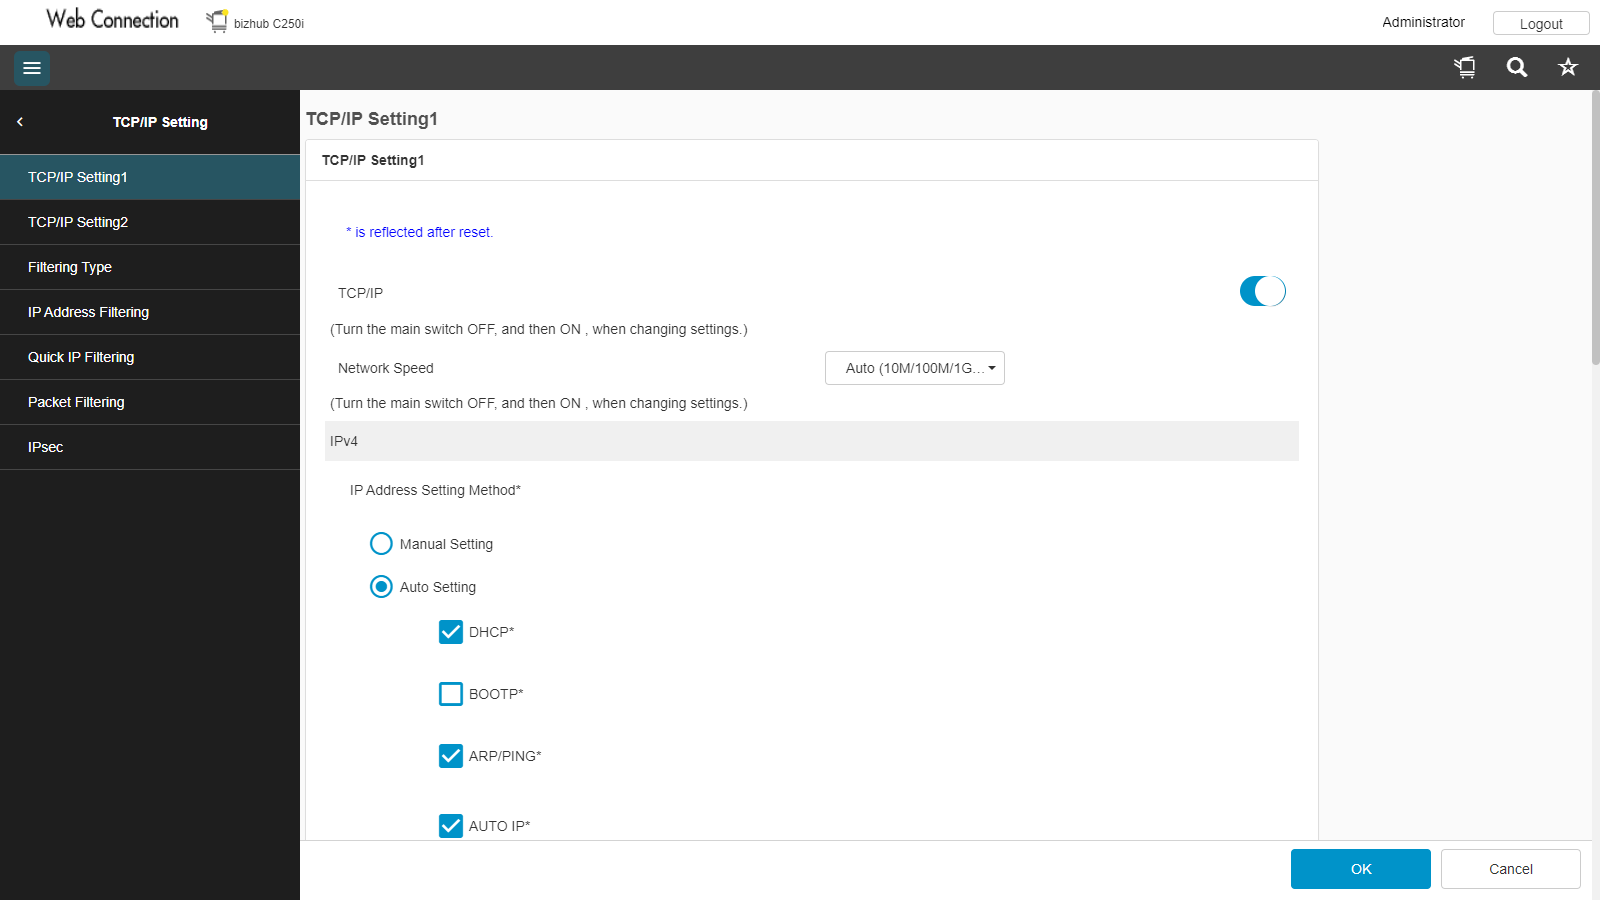
Go to Network -> TCP / IP Setting -> TCP / IP Setting1.
Enable TCP/IP.
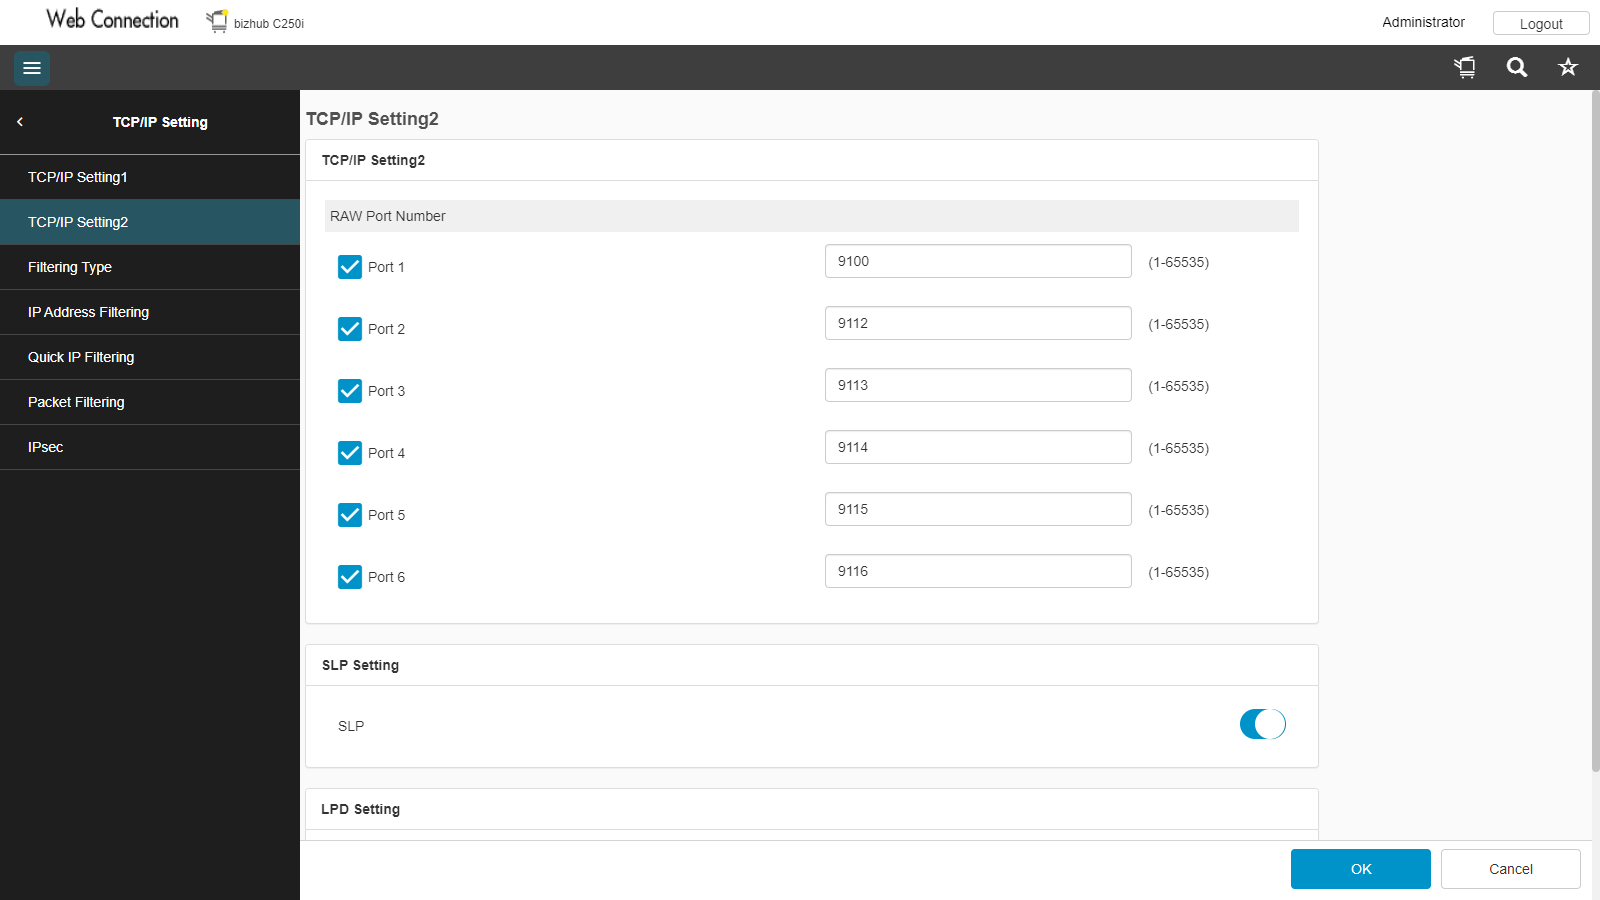
Go to Network -> TCP / IP Setting -> TCP / IP Setting2.
Make sure Port 1 is set to 9100.
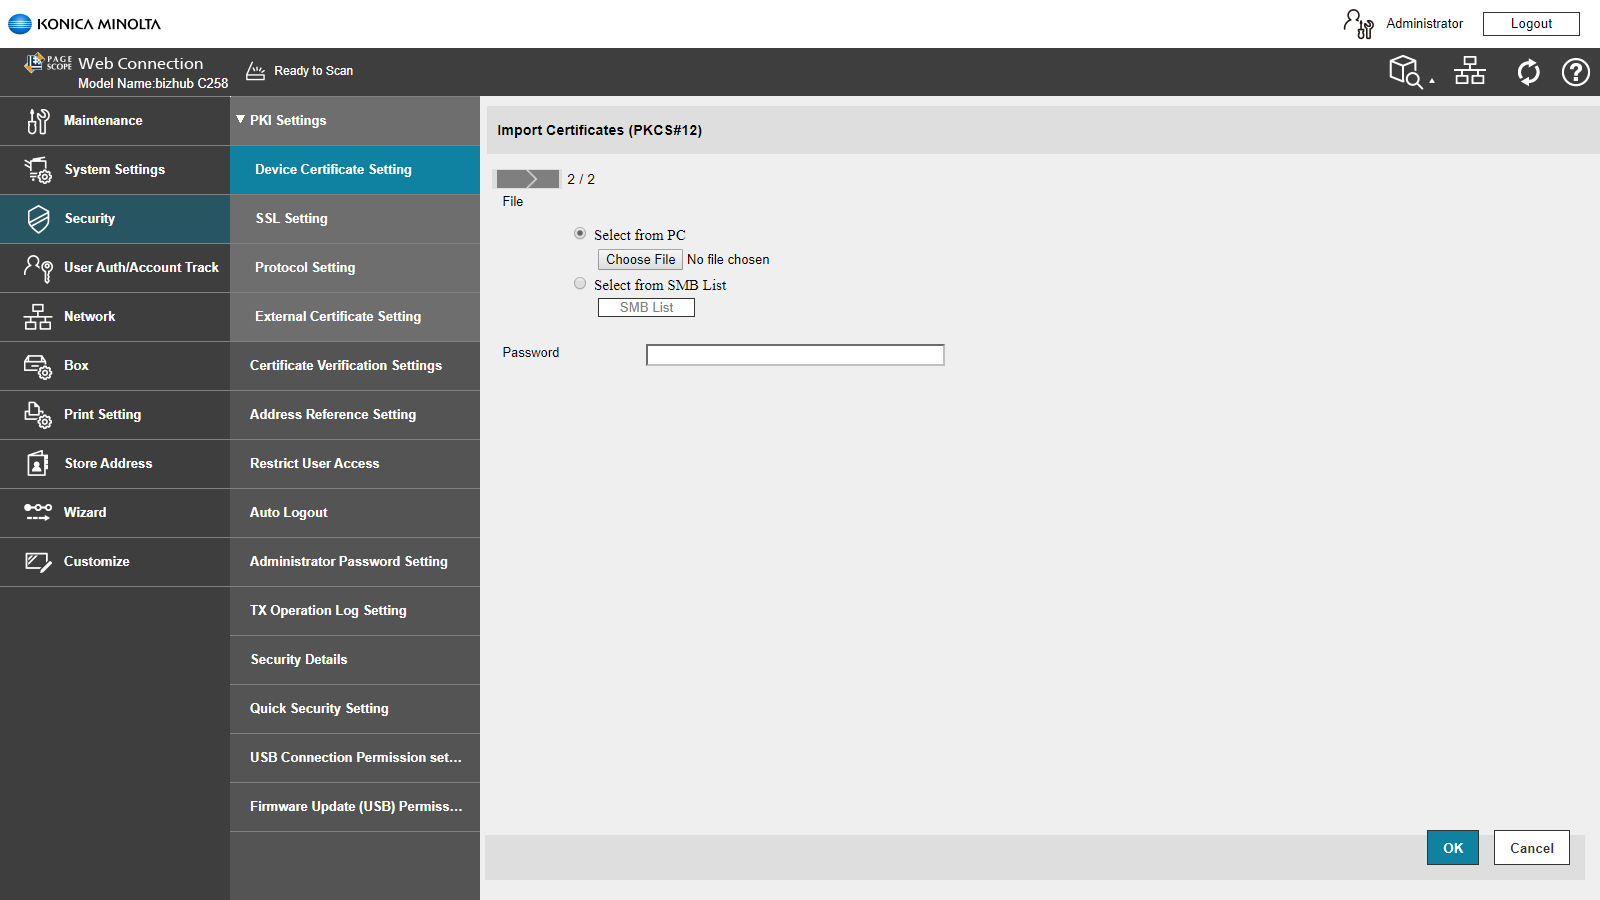
Select the file from the PC and finish the import certificate process.
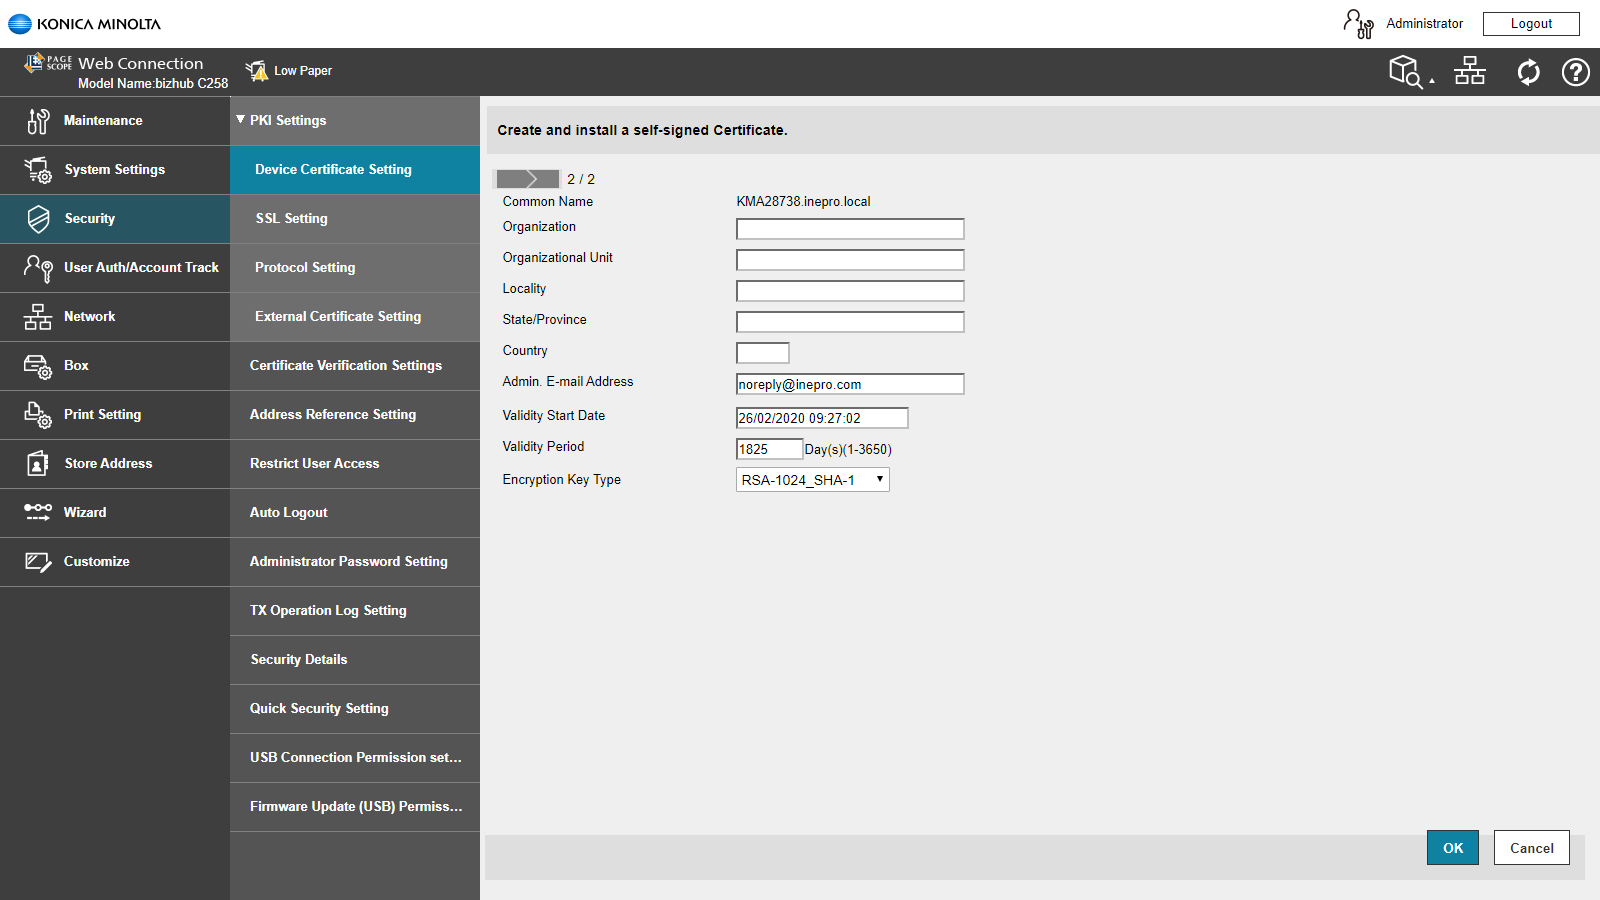
Fill in all the fields and finish the self-signed certificate process.
Make the certificate you selected earlier is also the certificate you have selected here.
Naturally the certificate must be valid.

Make the certificate you selected earlier is also the certificate you have selected here.
Naturally the certificate must be valid.